Showing posts with label plumbing. Show all posts

Saturday, 29 August 2020

Deck fills and Adaptors


2019 Update


So, I replaced the pump put deck fill with a standard stainless steel unit and it turns out that the fitting has the SAME THREAD, which I now believe to be 1.25" NPS  (as in....  national pipe STRAIGHT)  The forespar part consists of a male to male 1 1/4" to 1 1/2" NPS reducer and a 1 1/2" female NPS to NPT adaptor.    Seems so simple now...  

See more recent  posts on replacing these deck fittings.


Original 2017 Blog post


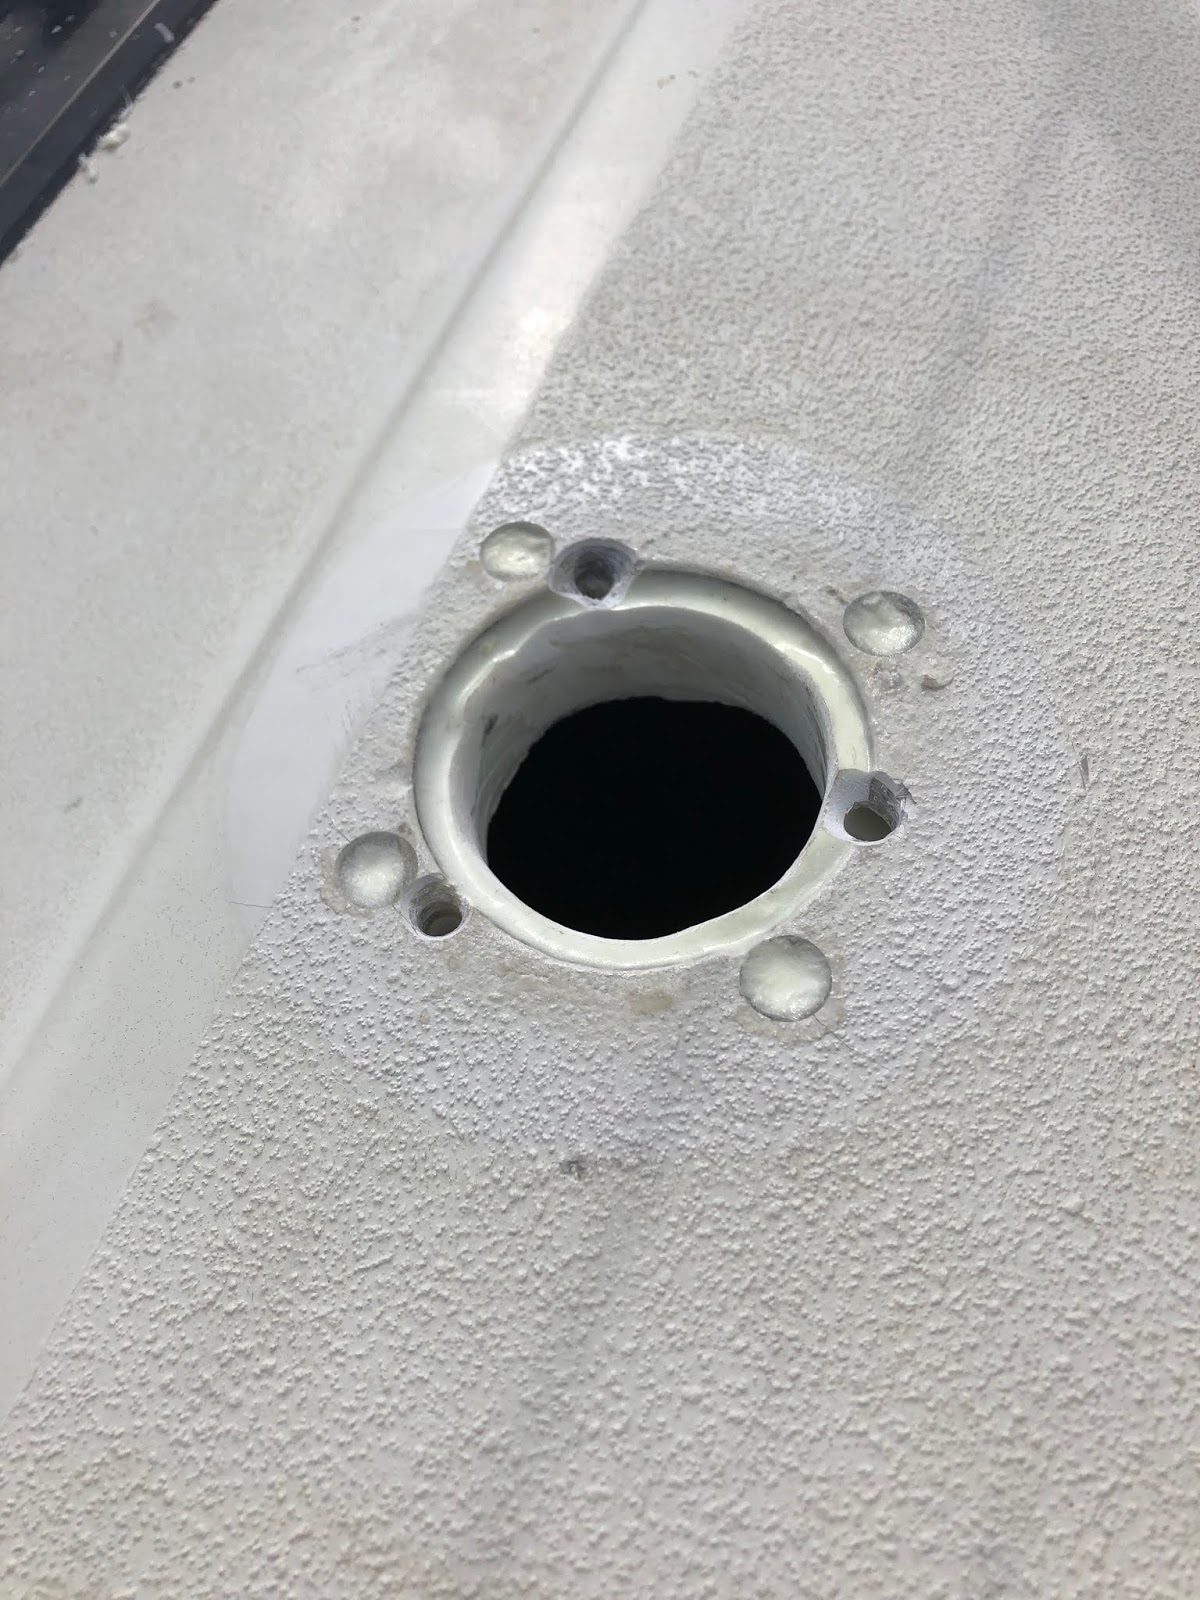
It appears I am one of the fortunate few who has the threaded adaptor that actually fits the original 33-2 deck fill.   Finding a replacement is nearly impossible, apparently.   I finally got around to taking this thing to two hose and fitting supply companies in Toronto, and neither could identify it.   One tried hard and told me the thread diameter is 38.5 mm, 12 tpi, (yes, mixed the units) not tapered, and is not:
BSPP
MPSM
UNF

WTF?


The deck fills themselves look an awful lot like the forespar MF-830 series.

UPDATE

OK, it looks like the 33-2 deck fills were made by a New Zealand-based company called RC marine, which was sold (along with Ronstan) to a corporation called Fortuna, which went bust mid 90's.  


The RC product line (and maybe others) was subsequently bought by Forespar in California, who continues to produce the same deck fills under the Forespar brand.  They are not widely distributed, and are difficult to find, and the connection to RC, surprisingly, is not readily findable on the internet.   In any case, the current Forespar Deck fills and associated spares are the compatible with our OEM RC deckfills.   (thanks Randy)


I have ordered a pump out adaptor.

Stay tuned.


UPDATE


May 6 2017

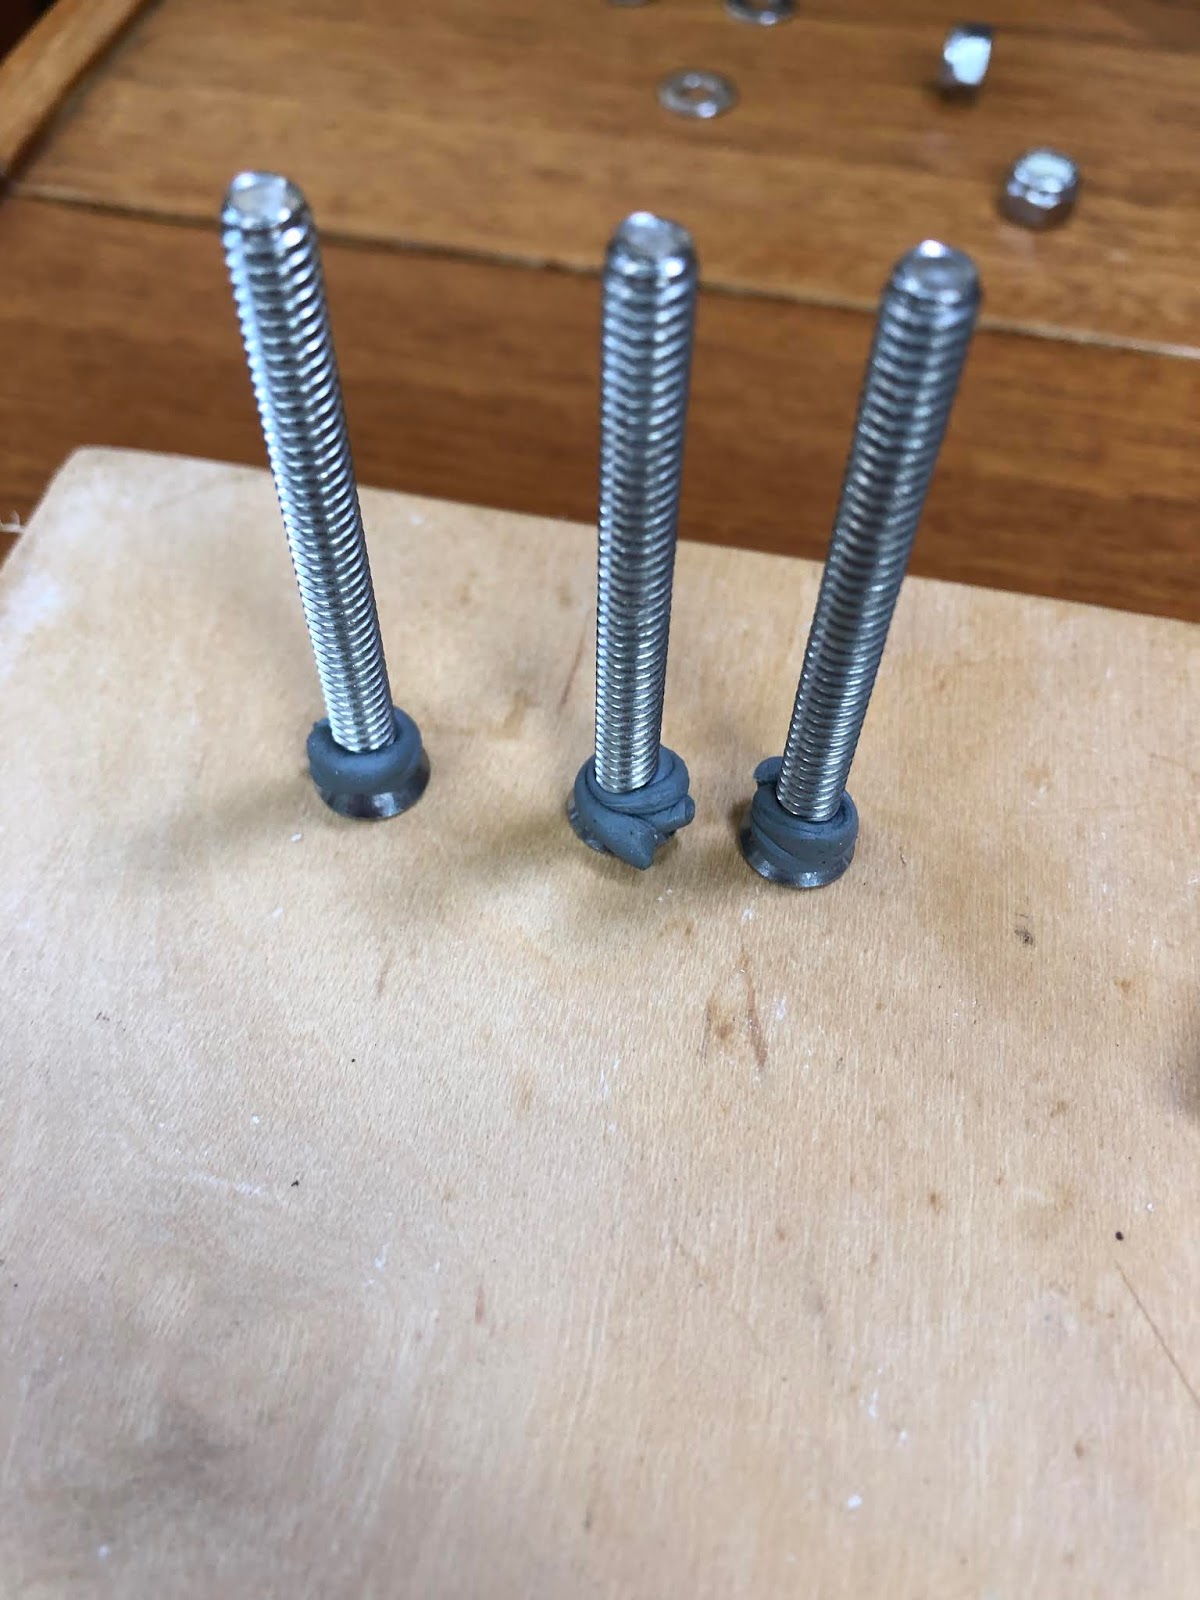
Got it.   Behold the elusive forespar MF-830, no doubt the prefix relates to its availability.


The pic is a bit dark...   As delivered the Forespar MF-830 adaptor consists of two pieces, screwed together.  It requires the addition of a cam lock hose connector to connect at the pump out.

What you get is a male to male adaptor, the small end of which (top thread in the photos) engages engages the deck fitting.  The large end (You can see a few threads)  engages  the second piece, which is a 1.5" female to female coupling.   

I wondered why the coupling was included - could the 1.5" male thread not fit a female cam lock hose connector?  Why three parts when two will do, as with my metal fitting in the photo above?

The 1.5" thread on both the coupling and the adaptor is not a standard north american tapered thread. (NPT style)   A cam lock hose fitting with a north american make thread will only fit if the tapered NPT male is threaded into the untapered female.  (like the metal example) The untapered male thread will not fit into NPT female thread. 

Anyway, it fits, it works, its available.   The readily available make plastic cam lock fittings thread perfectly into the coupling.  (the end facing down)  Nice thing is it is quite light.  I will attach a float, and the metal one will become a spare.

Fitting which fits.

Fitting which fits not.


Saturday, 27 July 2019

Deck fill core removal and reinforcement.

Dealing with Deck fills.

Water ingress over time will penetrate a cored laminate, and eventually cause rot, delamination and failure.   It is generally  recommended that the core be removed in these areas and replaced with solid glass, leaving the core itself un-penetrated by fasteners or fittings.   Failing that, holes or exposed core should at least be well sealed with epoxy to prevent water ingress.   Windstar, as with many older production yachts, had simply had the deck fittings installed directly through the cored area of the deck, with no precautions taken.

On Windstar, the fresh water deck fill and pump out fittings, though installed through balsa-cored areas of the deck, and had been well bedded with butyl tape.   After over 30 years, the fittings remained watertight and the deck core dry and sound.   While I was doing work that exposed this part of the deck,  I took the opportunity to take the precautions I describe above.


First project, the fresh water fill.

Below is an image of the deck fill penetration, which is through both the deck and liner.   This is a real pain as it is necessary to remove the liner to inspect or work on the underside of the deck.   Since I had elected to remove the liner to strengthen the deck to bulkhead joint anyway, it made sense to deal with the deck fill as well.  See that project here.  

After removing the liner, it was necessary to remove the core in a radius around the deck fill opening.  This was done with an allen key chucked in a drill, working from above.   Crude but very effective, it removes the core from approximately 1” around the existing hole.     The pics should tell the story, but essentially the shaft of the key registers against the existing hole and the spinning key removes the core.  Hold the drill with both hands!   

To replace the balsa, I made a circular plug the same thickness as the core.  This consists of 3 discs of scrap laminate, stacked and epoxied together.  A bimetal holesaw chucked in a drill press was used the cut the discs, and the material was from scrap panels cut from Windstar when installing hatches.

 That puck was fitted into the prepared area, well bedded in glass-filled epoxy putty, and the entire area was then glassed over.  The work is done wet-on-wet (really, wet-on-B-stage) to ensure the best possible integrity.   The holes were then bored for the new deck fitting from above.

And the fitting installed, (well-bedded with butyl tape of course) into a  a solid fibreglass section of the deck.   


Second project, different approach, the pump-out fitting.

For most situations, this is probably a better method of dealing with this task than I describe in the first section of this page. 
As before, the balsa core was removed using a cordless drill and allen key.   In this case the Allen key was ground to the length required to remove only enough core to comfortably clear the screws of the replacement deck fill.  The interior skin on the C&C is thick enough that it remained intact, which is a great help.

Using two hole saws and interior fibreglass retained from this project to make an interior  reinforcing/backing  washer for the fitting.


The gap created between the deck and inner skin was filled with epoxy/glass putty.  The deck fill,  which was wrapped with polyester packing tape and heavily waxed, with its backing plate, was then inserted from below.  the remaining space and the screw holes were then filled with more glass/epoxy putty, and smoothed with a gloved finger.


The deck was then wiped down with an acetone-soaked rag.  Once the epoxy cured, the fitting was pressed out.   The opening was sanded to soften its edges and remove any "flash", and the fitting was reinstalled from above and the new screw holes drilled.  The fit is quite precise, as you might imagine.   


Because the previous holes were countersunk, they were not hidden by the new, smaller fitting.  I elected to make a UHMW (starboard) pad to hide these.   I used the same concentric holesaw technique above, and radiused the edges using a router table.

And the fitting and its screws were all bedded with butyl.


Diesel fill will be replaced at some point.


Sunday, 11 June 2017

How to drain the ice box?

Here is a photo of Windstar's ice box drain pump.  It is a Beckson SiphonMate hand pump, mounted in a bracket below  counter.   The inlet is connected to the ice box drain, the outlet to a length of hose which is not connected to anything, but  is long enough to reach the sink.


When Windstar showed up, the self priming SiphonMate was not.  Replacing it with a new one solved the problem.   It is a simple, effective approach, however I would prefer a drain that was direct plumbed into an overboard drain rather than relying on a coiled length of hose.   Pretty low on the list of issues, and mainly,  I post this for those who would like to see the stock installation of the SiphonMate.

A recent discussion on the C&C mailing list was started by an owner with a blocked ice box drain hose, which left me puzzled.  Drain where?  The bilge?  Nasty.  Turns out there were others with the same plumbing, (a prior owners' fix?) and others who had addressed this in different ways.

Below is Lee's solution, repurposing a seawater pump and faucet.   I expect the seawater pump was a dealer option.   (Windstar has only one footpump, from the freshwater tank.)

 "I have no need to have lake water at the sink so we repurposed the pump to drain the ice box. The hose goes from bottom of ice box to foot pump at foot of sink. This pump used to pull lake water in an dispense in the sink."