Welcome. This blog is intended to share and discuss upgrades and modifications to Windstar, my 1985 C&C 33 mk ii. please use the web view and browse the posts by type or date.
Saturday, 29 August 2020
Cutlery Drawer Organizer in Acrylic
First-Aid Kit Mounting Bracket
Winter 2015.
This is an industrial-type first aid kit in a nanuk case, purchased through Vallen. It will be mounted overhead at the foot of the quarter berth, (overfoot?) on the inside of the bulkhead that forms the back of the engine instrumentation/control wiring chamber. (so the case will be upright, resting on the mahogany chock, secured by the velcro and the strap)
Two layers 1/4" acrylic, fused with methylene chrolride, industrial velcro and a captive webbing strap to secure. Scrap mahogany chock, fitted to case.
Took more time to simplicate the concept than than to make. Out of the way, but easy to retrieve.
Vacuum flask/Thermos rack
This is a simple project that has improved the comfort, safety, and livability of Windstar for shorthanded (or any) sailing. It is simply a secure rack for two vacuum flasks. I typically preheat these with boiling water then fill one with hot water and one with excellent coffee. I keep a small electric "marina" kettle aboard as well as a stove top kettle. Filling these is a morning ritual.
Monday, 17 August 2020
Cockpit Locker bulkhead
Cockpit Locker Bulkhead
 |
| Add caption |
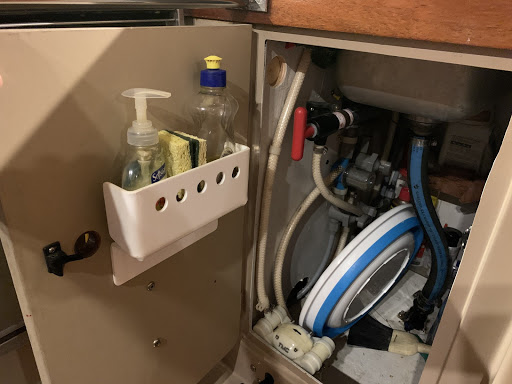
Galley Soap Stowage
Galley Soap Stowage
An easy evening project here to solve something that had been annoying me for awhile.. Where to keep the hand and dish washing soaps, and scrubber.
This location is otherwise unusable; the small space between the sink and the door, and between the door catch and the pump handle.
Unfortunately this rack limits the travel of the pump by an inch or so, a detail I missed in the design. Not a big deal and I’ll leave it as is for the extra space.
One more thing ‘in its place’!
On the bench you can see the strip heater, required for bending acrylic.
Monday, 2 September 2019
Upgrading the Galley
- Fridge lid 23.125"w X 33d incl rabbet
- Sink portion 24.5d X 18.5w
- Engine box cover 39.5d x 19w
- Soap storage and dispensing has a dedicated home. Done, see this post.

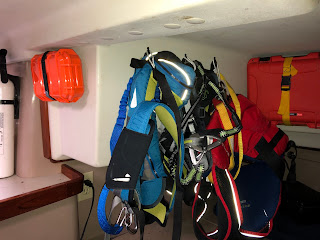
PFD and Tether stowage
Another item off the list of minor irritants...
Paper Towel Holder
Hardly worth mentioning, but....
Simple solutions often punch above their weight and this is no exception. I had pondered over a paper towel holder for a while before coming up with this simple solution. The unseen end of the shock cord is attached to a small eye strap mounted on the bulkhead.
Sunday, 28 July 2019
Where to keep the Flares?
Flare storage box and mounting bracket
I scoured Amazon for boxes and found this - a perfect fit. I then made a fitted bracket and installed it in a visible but out-of-the-way place. Will add a bright and easy-to-read label.
The bracket is made of 1/4" acrylic plastic, bent using a strip heater. You can see that there is a doubling of thickness on the back of the bracket to permit the strap to pass. That doubling was done by fusing two layers of acrylic together with a solvent called methylene chloride. I have used this stuff many times without incident but this time I unknowingly splashed some on my leg, the result being some deeply-blistered chemical burns that I became increasingly aware of some hours later. (these are taking weeks to heal)
It's a easy to be cavalier about safety... please be careful.
Monday, 27 August 2018
Another storage addition.... Hatch in Nav desk footwell.
Am pleased with this addition - the volume available is surprising, and I like the idea of any opportunity to increase airflow throughout the boat.
Hatch is made by Viking products.
Th
Sunday, 21 May 2017
Port side settee stowage access
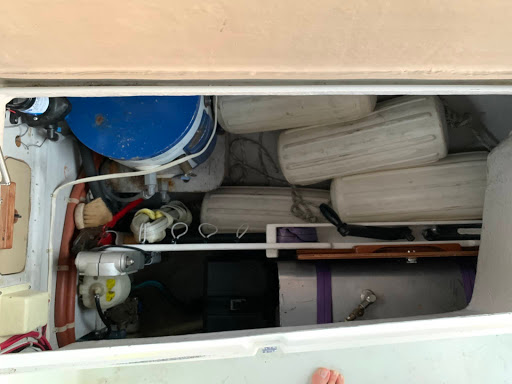
A 9600 lb racer-cruiser has limited stowage for even short cruises with more than 2 people.
One of the things I dislike about the 33-2 is the way the port side fold-out double berth impedes access to the only large stowage area in the boat. In the pretty drawings, they don't show that the under the starboard settee resides only the fresh water tank, under the V-berth resides only the holding tank, and under half of the quarter berth resides one small locker and two batteries in a difficult to access locker. The port settee is available for stowage, BUT the drop leaf table must be dropped, the seat cushions removed, and the berth extension folded out before you can lift the covers to access the stowage. A nuisance! Also, it's all one big compartment so the reserve beer and wine can crush the reserve potato chips. (Apparently the water tank was moved to this side on later production years.)
I wanted more convenient access to this settee locker, so I decided to add some hatches as you see in the photo. I chose Tempress 1115 (11" X 15") slam hatches. There are others, but these are: "as functional as they are stylish"
Stylish!
See below for photos, fairly self explanatory. I used a bimetal holesaw, and my fein multimaster with a circular bimetal blade. Next step will be a simple barrier between the two compartments.
In future the chips will meet the beer only at the time and place of my choosing!
Sunday, 26 March 2017
C&C 33ii Emergency Tiller Refinements
C&C 33ii Emergency Tiller Refinements
Update
Dealing with the tiller
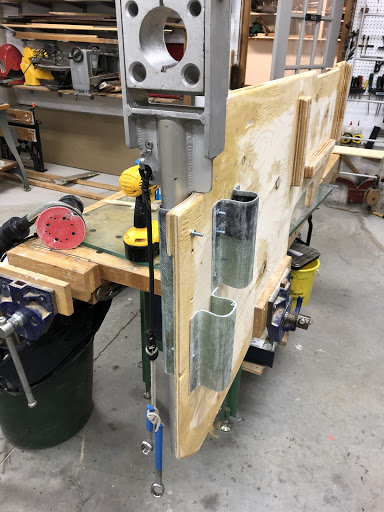
C&C supplied a very nicely made alloy emergency tiller with the 33ii, and designed the boat so the top of the rudder post is easily accessed. So, dealing with steering failure should be relatively simple - just slip the tiller over the post and till away. Right?
Well, not exactly. The cast aluminum tiller head's bore is a very snug fit on the stainless rudder post, and in my case, due to some very minor dings on the sharp edge of the bore, it was not possible to slip it over the post at all. Even without those dings, once started, it was not possible to fully seat the tiller by hand pressure alone. The tiller is secured by a stainless bolt that requires two 3/4" wrenches to tighten. These were simply taped to the tiller. (nothing to go wrong there!) All things considered, not what one would want to be dealing with in an emergency.
So, I filed a chamfer on the edge of the bore itself, then sanded the bore smooth(er), and waxed it. Hopefully it will slip more readily over the post.
Wednesday, 10 August 2016
Lexan Shelves under sink
Simple solution that works.
Mahogany knife block.

I enjoy cooking (even on a boat) and dislike cheap, dull knives. Below was made from some mahogany door jamb material I had on the lumber rack, fitted to some Henkel commercial knives I found - was told these are the choice of most working restaurants/chefs. They are quite fine for the boat, and the rack is, I think, a decent solution. It was placed near the finger-hole to leave space on the left for future considerations.


