Portlight Replacement
Page Under construction - write up incomplete.
In the end I masked the hull, installed the windows caulked, tooled the joint and (eventually) magic!
Getting there however .....
Never finished this write up because I think I’ve wanted to forget the whole thing - what a hassle. I made a few mistakes that caused most of the problems though the prep was a ton of work due to damage by the PO.
I Don’t mean to be discouraging - in the end the windows are fine, and look good, and I could do the job again without any issues.
Basic steps
I had 1 gallon of gel coat tinted at Canada composites - after filling Any gel coat damage I re-gelled and feathered it all in. The match isn’t perfect but it’s extremely close you’d likely never notice.
The Plexi is secured with 3m vhb tape - note one thing - many YouTube videos show this stuff securing windows with a simple press in place my hand. (Ta dahhh! Magic!) This doesn’t work with curved windows! The tape’s bond improves with pressure and most importantly time. You need to clamp the window in place for awhile - overnight at least - otherwise it will spring back at the ends, opening a gap - and a nice new leak...
I finished the job with black Dow silicone 709 I think but I need to verify this. This is great stuff to work with and I take back what I’ve always said about silicone on a boat. Leave plenty of room around the perimeter for caulking!
My mistakes
1- I used the oft recommended glaziers suction cups for clamping, fastened below decks and bungee corded to pull the window into place. Most entertaining and dangers when they let go and wholly inadequate. The fix was to devise a lever clamp that secured into the jib sheet track and could bused to push the window onto the tape. Long story...
2 - I cut the windows too large - this made it very difficult to caulk and I had to shave the gap larger lying on my side using a dental scale removing pick thing - took several hours. This was made much worse by problem # 1.
These mistakes were both discovered after the window was caulked and the making removed....
Will write this up better at some point in the future...
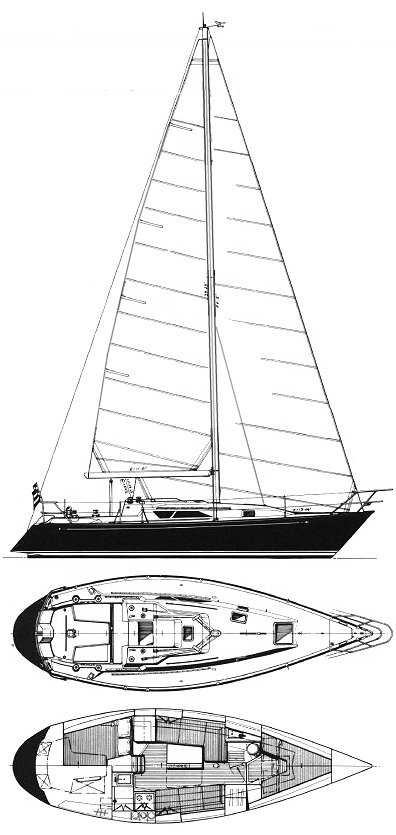
This series of C&C yachts has its bronze-tinted, acrylic portlights set into a rabbet in the molded cabin sides. The flush, frameless look is sleek, but it does create more work than framed portlights when replacement is required.
Windstar's starboard portlight had begun to uninstall itself and leak at the beginning of the 2019 season. A temporary repair got Windstar through the summer but replacement was required..
It had come unglued and opened 1/4” at its forward end, but remained firmly bonded for most of the rest of its length. Using a mallet with a wooden drift and wedges, and a great deal of struggle, it finally yielded, though n two pieces, taking some gel coat chips (hidden) with
it. Removing the brittle residual adhesive was also a battle and required scrapers, a random orbit sander, and my trusty fein multi-tool with both a diamond rasp, and coarse sandpaper.
The port-side portlight was not leaking. It had been repaired previously, as evidenced by some large chips in the gelcoat that had been sloppily re-glued in place, and by the use of a different sealant, possibly silicone. The sealant was tidy and well done, but the chips and a couple of large gelcoat cracks looked awful and I figured I'd best repair those and replace both portlights at once.
As with the starboard side, I figured that a wooden drift and mallet would fracture the joint at one end with progressive wedging and tapping to slowly fracture
the rest.
It didn't work. Even with hard-as-I-dared mallet blows
from a hefty brass mallet, there was no movement at all. At this point I was quite concerned that the window may have been epoxied in
place. (As with a friend's cnc 32)
After a bit of thought I decided to try cutting through the sealant
from outside. This was surprisingly easy, and the knife (olfa boxcutter) plunged deep
into the joint. Second attempt with mallet and drift separated the
aft end, and this time, working a putty knife to progressively cut the sealant from inside, and wedging along the portlight's length
as I cut, I was done in minutes, with little effort, and no incremental damage.
Did the PO really use silicone to secure the portlight? It feels like it. If so, its hard to dispute its suitability.
As you can see below, the installer didn't skimp on the goop, and if you look closely you will see why, and how much damage was done with the prior window replacement. Not a lot of gelcoat left and some big chips. I attacked this with a razor, then with a stiff wire wheel in a high RPM hand drill. Worked pretty well, but there is still a lot of residue.
The window came out easily once the sealant was cut with a knife. It was unyielding before that.

The consistency evokes the delicious buffalo mozzarella I had last week! Feels a lot like silicone. Note gelcoat cracks.
Nice chip repair.... and the sealant once sliced off.
Part of the rabbet wire brushed. (Those chips came with Windstar..)
Not a lot of gelcoat left.
So... More work than I had hoped, but worth doing.
How do I clean the residual silicone - if it is silicone- from this rough surface prior to filling?
General notes and comments from others.
A catch-all page for the moment as I plan the replacement of falling-out portlights and crazed hatch lenses.
Materials required for the companion way hatch and portlights
- 2 portlights - Dark bronze acrylic 73”x 9” x 3/8"
- 4 tubes sika sealant and primer.
- 1 companionway hatch dark bronze acrylic 27.5” x 30.5” x 3/8”
- One Atkins and Hoyle foredeck hatch 20.5 X 20.5
- Two Atkins and Hoyle small hatches 13.25X7.5
- Sealant for hatches.
Allowance should be made for working - those dimensions are of the finished piece.
See below for responses to a question posted to the C&C mailing list.
On re glazing hatches
Don't use acrylic, use polycarbonate and make sure it's UV protected. Mount with 3M VHB tape and seal to the hull with a quality structural silicone (Dow Corning 995). This is the same method keeping glass in skyscrapers (and skylights). Use masking tape to mask the area around the edges and shape the bead and be sure to tool the sealant. No caulking out there is properly applied if it isn't tooled, regardless of how much testosterone there is in the claim. Untooled silicone is not watertight. A wet finger works OK but I usually use a silicone bead spray and a plastic spoon. The spray is available at Home Depot for a few bucks. The spoons . . . . McDonalds. The spray virtually liquefies the sealant for a few seconds and make a nice bead. Remove the tape a minute after the bead is finished.
To:
cnc-list@cnc-list.com
Cc:
Bcc:
Date: Thu, 29 Aug 2019 14:40:20 +0000 (UTC)
Subject: Re: Stus-List
33-
2 portlight material
I took a different tack on this one...after going to school on Dave Godwin, (he has a great blog site which documents his complete rebuild of his 37), and seeing how wonderful his windows looked, I took out my old windows and sent them to Maritime Plastics in Annapolis and had them make new ones, then they shipped them to me and we installed them; I figure I spent about $1100-1200, which is in the same ballpark as the kits: I am so happy not to have leaks I sometimes go sit in the boat during rain just to watch my dry windows....!!!
Subject: Re: Stus-List
33-
2 portlight material
I got this kit (included frames, mounting hardware and new plexi windows) from Dan Boisvert @
fixleakyboats.com for my
33-
2 in 2009. Since removal of the old windows and installing the new ones was a skill I hoped to never use again, and because I wanted someone to complain to besides myself if the new ones leaked, I had the fibreglass shop at my Marina install them. The new windows have stood up well for 10 years. Having said that, I have friends in my harbour with a C&C 32 who ordered the kit and the very same fibreglass shop had a bit##@ch of a time getting them to fit and they complained that the support from Dan was poor. After removal of the old windows, the new plexi is put into place with sealant and the frame provides compression to the seal by numerous through screws with wing nuts on the inside of the cabin. Once cured, the frames outside are calked, the wing nuts inside are removed and white nylon cap nuts are placed over the screws. Looks good from outside. It's not an awful look inside but the nuts are noticeable (to me, no one else has ever commented on them) and the shop had to re-install the accordian curtains a little higher to clear the nylon cap nuts. Overall, the cost and new appearance was well worth having a dry boat. Cost for the kit in 2009 was about $1500 CDN.
I haven't looked at his website to see if there are other reviews so this is my personal experience with these kits
Wade
Subject: Re: Stus-List 33-2 portlight material
Dave, when we did Perception for the second time we used 3/8 cast polycarbonate. I had Rob at south shore make them for me as the previous replacement damaged the frames and had used 1/4" extruded poly, which had cracked, and he had the original templates. We had them installed and the frames repaired - all is well 5 years later! You can get the material from Plastruct Polyzone in Beamsville, I have used them for the hatch board and slider.
Paul
Subject: Re: Stus-List 33-2 portlight material
FWIW, I was told by a local glass shop expert that, although Lexan scratches
more easily, it is preferred if you are concerned about weight (like a crew
member) cracking the lens. I have two hatches (of five) where this is a
concern. According to this expert, if you are not concerned about the
weight-bearing capacity, plexiglass will hold up better over time.
Matthew
-
Subject: Re: Stus-List
33-
2 portlight material
I measured my
portlights as 1/4" thick. I think I bought acrylic (what the company uses on all the are boats) and had them round the outside edge and buff it smooth to look like glass.
Chuck S
>
Subject: Re: Stus-List
33-
2 portlight material
Hi Dave, I used 6mm acrylic with a
light bronze tint when I did mine this spring and it matched the original perfectly. It is my understanding that the UV and scratch resistant polycarbonate get those added properties from coatings applied to the surface and that these coatings don't last that long. Also I believe that Lewmar used acrylic on their hatches but it is much thicker, somewhere around 12mm.
Morgan
30-2
Subject: Re: Stus-List
33-
2 portlight material
Cast acrylic from Laird Plastics in RI. Give them the old ones and they will replicate.
Subject: Re: Stus-List
33-
2 portlight material
The companionway hatch and a cabin "moon roof" on our boat are thicker, maybe 3/8", but I would like it to be double that, like 3/4" so people could stand on it safely. I'm looking into replacing with 1/2" acrylic and adding some reinforcement ribs.
Chuck S,
--
Subject: Re: Stus-List
33-
2 portlight material
I made templates myself from 1/4"
material to match my
portlights and had a local company, Annapolis Marine Plastics replicate them. I chose the darkest color and the new pieces look better than new. Haven't mounted them yet, but I think dark is the way to go.
Chuck S
A
Subject: Re: Stus-List Fwd: Replacing Windows
Message-ID: <DA752E7C-F34E-484B-B20B-096BFF9F1EA5@gmail.com>
Content-Type: text/plain; charset="utf-8"
I just looked up my McMaster-Carr order, and I used 5952 series 3M VHB tape. I
updated the ?new portlights? on the Johanna Rose blog to reflect this along
with the McMaster-Carr part numbers.
The 5952 series is black and is 3/16? think. In my case, with the 1/4?
polycarbonate, this thickness was perfect. It provided enough of a gap for the
Dow 795 with the portlight ending up slightly proud of cabin surface. I
would not try to double up the thickness. I think it is more important to
put a good bevel on the inner edge to help the sealant flow underneath and
around the edge to form a good beaded adhesive seal.
I looked into using Sika with the VHB tape, but after researching, I found that
there were many good reports of long-term success using the Dow 795. To
add to this track record, Dow 795 is much easier to work with and costs about
$8 per 10.3oz cartridge (both big pluses for the DIY-er).
http://svjohannarose.blogspot.com/2015/07/new-fixed-ports.html <http://svjohannarose.blogspot.com/2015/07/new-fixed-ports.html>
-
Paul E.
>
> Subject: Re: Stus-List Fwd: Replacing Windows
>
> The attached PDF had pretty good guidance. I would choose the
thickest
> tape which can still fit under the windows. Maybe even double
layers. I
> have a friend who used the 4941 series. After looking at the PDF it
looks
> like the 5952 series has better adhesive qualities and possibly higher
> adhesion for the fiberglass and polycarbonate that we're using. The
5958FR
> has the highest PSI to thickness ratio. I suggest thicker to allow
the
> tape to press into any irregularities. Thicker also allows for more
> differential expansion of the glass and frame.
>
> As much as I like the VHB tape I still can't help but think to the auto
> industry. They use a urethane made by Sika for windshields. It
has to be
> primed and heated. It cures in about an hour. I wonder if a
combination
> of VHB tape and sika-flex might be smart. VHB to get a nice interior
> finish and sika for a permanent weatherproof bond and glazing.
>
> Josh
--------------
Subject: Re: Stus-List Fwd: Replacing Windows
Besides being bulletproof, a good reason for using polycarbonate is that
it is much more flexible than acrylic. You do not have to force it, it
will almost noodle its way to fit on the curved surface. The
drawback of using polycarbonate: cost, UV degradation, and surface scratching,
are less of an issue these days. Bayer makes an extended abrasion and UV
resistance polycarbonate called Makrolon 15. A piece of 1/4" x
10" x 43" transparent grey goes for $35 at EStreetPlastics.com <http://estreetplastics.com/>.
-
Paul E