Showing posts with label Belowdeck. Show all posts

Wednesday, 14 October 2020

Battle of the bilge - Oct 2020

It must be getting toward time for a new boat as I am now addressing things that are minor annoyances.  

In this case its a few minor water traps that are harmless but harbour mildew if the boat is left for any length of time.  (sailing keeps this water moving and draining.)   Most production boats suffer from this to some extent, and can be improved with correctly located and finished "limber holes" that permit the water to drain and find its way down to the bilge sump, and with greater ventilation through all enclosed lockers and spaces.  I believe that the 33-2 would benefit from a grate replacing the centre panel of the cabin sole, and from lift-out sole boards in the rest.   This is quite doable, and I may just....

In Windstar’s case these limber holes were drilled in a variety of locations, but being round, and sometimes blocked somewhat with resin, they did not always allow the water to fully drain.  Improvement requires turning the round hole into a mousehole, and grinding away any resin blobs or build up that block the flow of water.  Fussy time consuming work that is understandably not first priority in a production setting.      

Below are photos of the bilge with teh cabin sole removed.   Note that in the photo below you can see a raised area in the hull indicating a small cored area or structural shape.   The 33-2 is widely described as having no cored areas below the waterline, however there may be a small area here, in the flat section forward of the keel.  Yes, the 33-2 has a flat bottom, forward of the keel.


The main cabin, below the sole (floorboards) where you can clearly see the beige liner and the lighter coloured hull and "spider" structural grid.   This grid is undamaged and remains as new.  
The liner in this area is not structural though it is bonded with putty to the top of the grid, to form a flat landing for the cabin sole.  The sole is screwed to the liner.  
The liner is bonded to the hull with both putty and fiberglass at the inner bottom inside edge of the settees and at the bottom of the space behind the seat backs.   The glass work is solid, smooth and well done and very sound.  This excellent bond most certainly incorporates the liner into the hull's structure.   

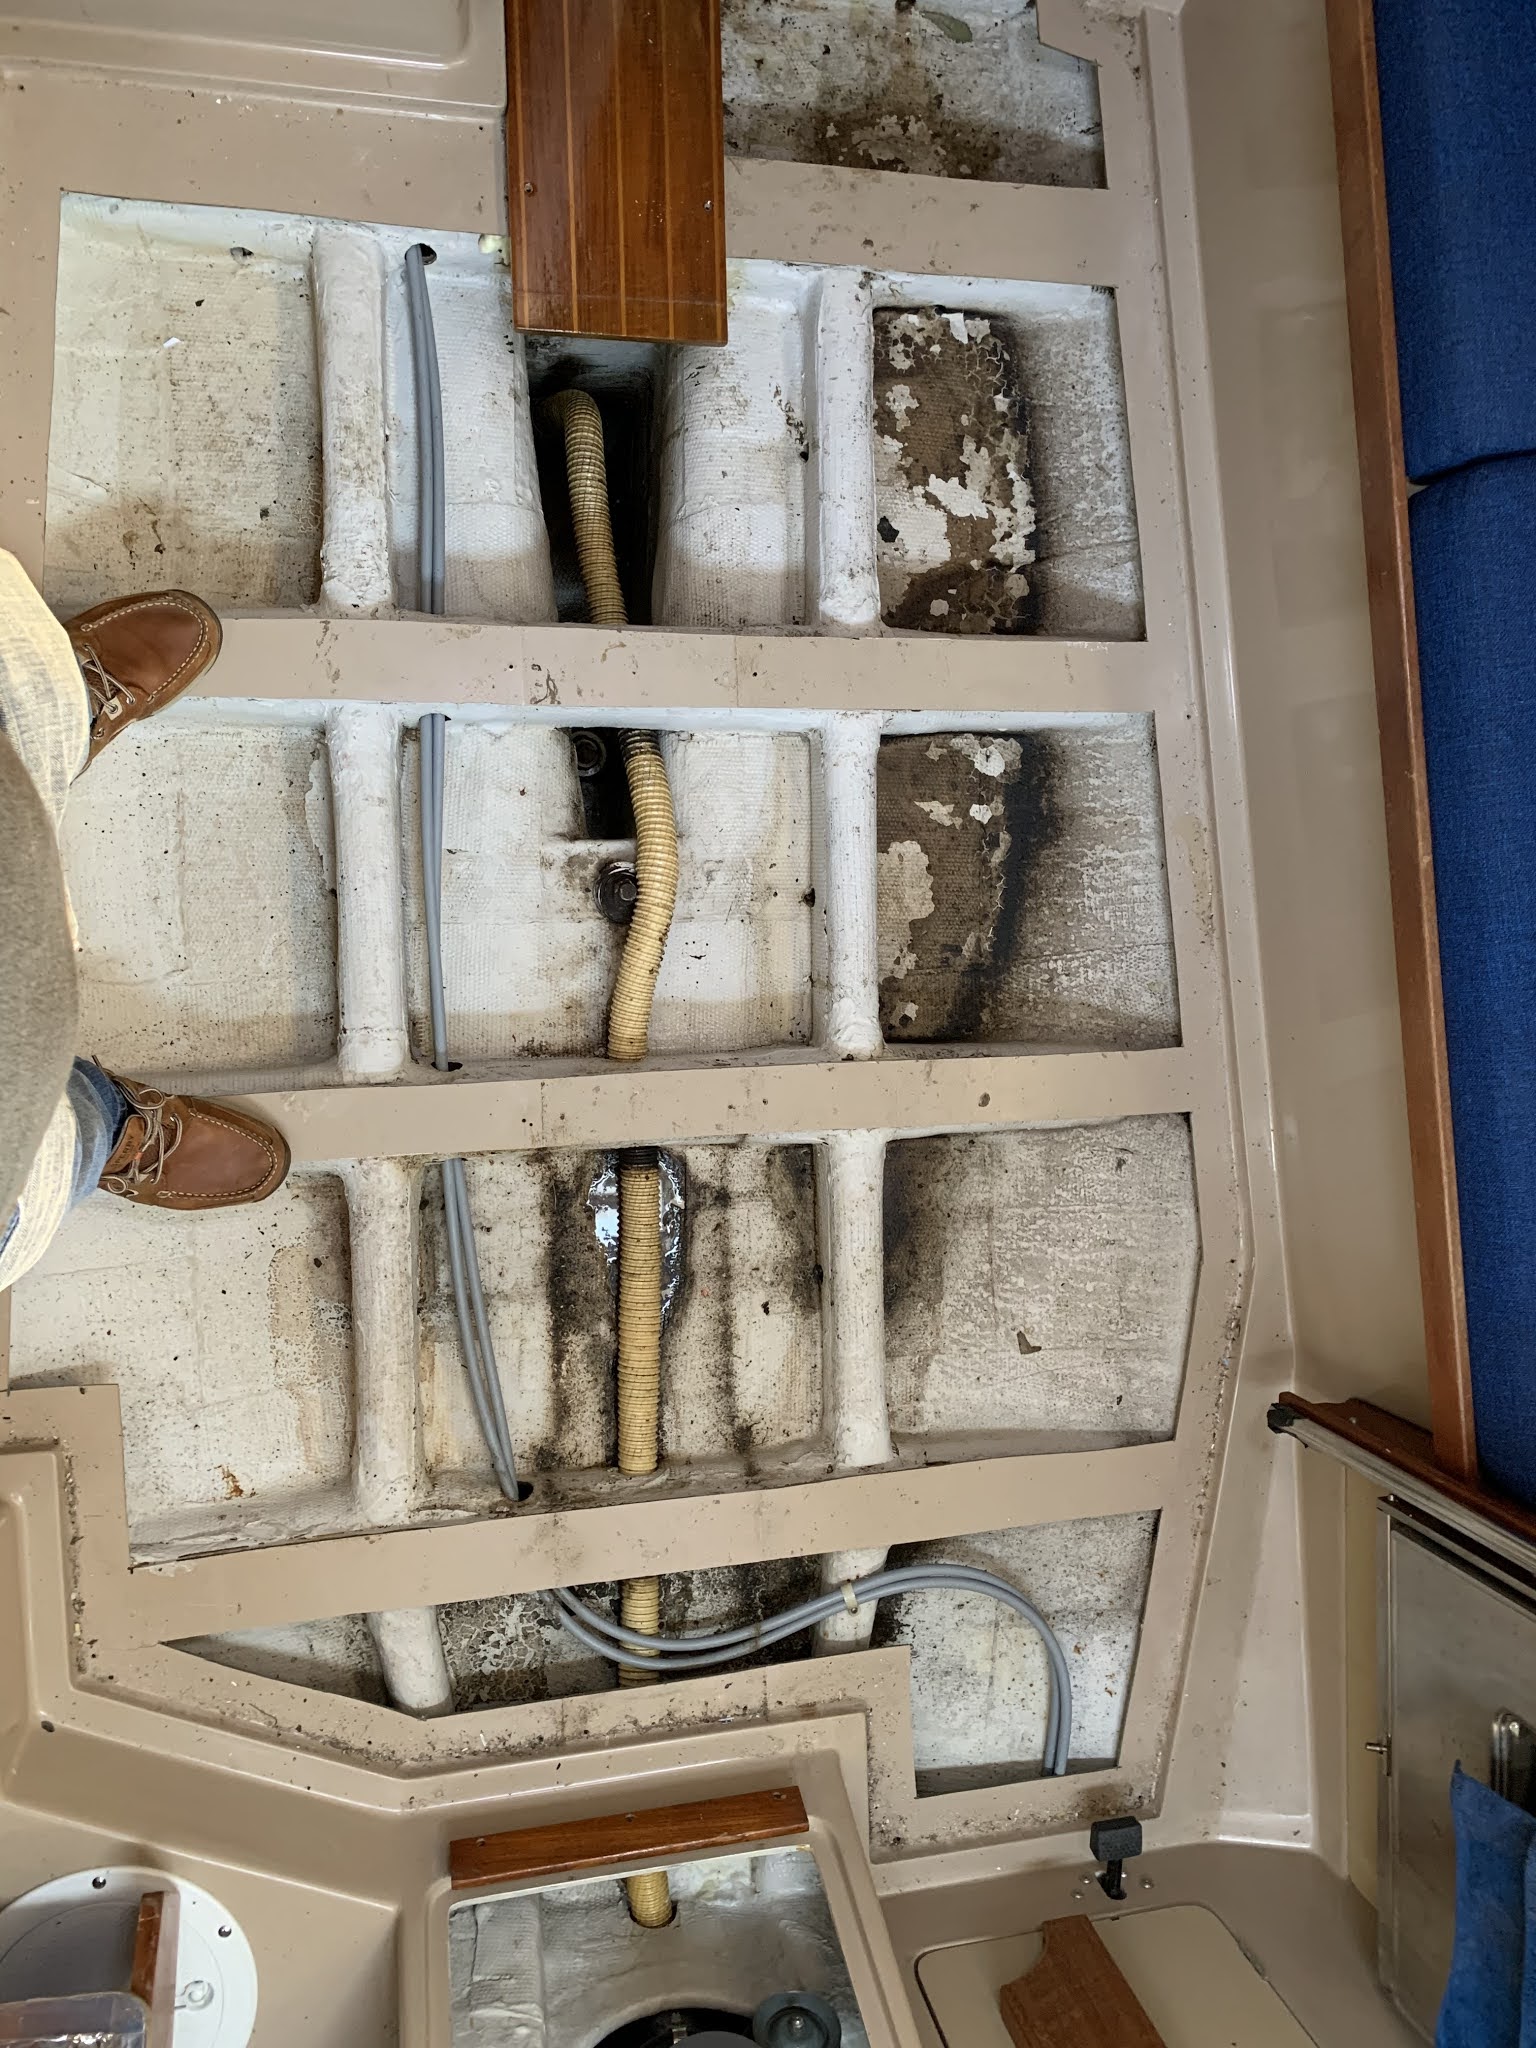
This most excellent bond below the settee does have one disadvantage, and that is that it does not permit water to drain.   (as when you allow the tank to overflow with the inspection port open, or when a tank fitting fails.)


In the two preceding photos you can see the "high tide" marks left by the standing water.   

While the boat was apart I pressure tested the water tank to 10psi.   No leaks.

Below after grinding the limber holes, cleaning, sanding and rough spots and glass edges, and painting.
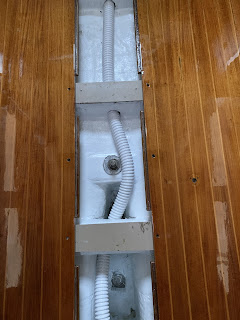
Note that the bilge pump hose is being replaced as well.  (the original factory hose was intact but I felt it was prudent to renew, given its age)


....And since I was doing that, 8 coats of varnish on the cabin sole, and two thick coats of epoxy on the underside and end grain.   


.....and since I was doing that, I decided to reinforce the area where the aft keelbolt bears.   https://cncwindstar.blogspot.com/2020/10/aft-keel-bolt-reinforcement.html

...And since I was doing that, I figured I'd re-bed each keel bolt, add some reinforcing plates, and clean and polish the hardware.


Looking forward to messing it up next season!


Monday, 16 September 2019

Saloon Table Upkeeper

Turning on the Table

Inconsistent upkeeping has been the downfall of my saloon table.   Many times. 
A few weeks back, it downed yet another Guiness,  and I resolved that it would thereafter remain remain upstanding. 

Proof of concept


Trial Fit in Mahogany


Finished upkeepers


Should be self-explanatory.  These were made with some scrap mahogany door jambs that were on my wood rack.
The ends were fitted to the table support struts and a 3/4" diameter rare earth magnet was flush fitted into the backside of the piece, behind the knob.
A plated steel disk was set flush into the plywood table side, opposite the magnet, and in two locations - one to secure the upkeeper when in use, the other to store it when the table is folded. 
Works better than I could have hoped.


Monday, 2 September 2019

PFD and Tether stowage

Another item off the list of minor irritants...

In 2019 I spent some time looking at the clutter in Windstar and the stowage of various items which were either routinely taken out then put away (not not), or might need to be accessed quickly, possibly in an emergency.   PFDs made the list.  These need to be stowed out of the way, readily accessed, in a well ventilated space, and should not be an impede access to other stowage.
The volume and bulkhead space within quarter berth area fit the bill, and works with how I use the boat.   
The shock-corded hooks proved to be a simple solution.


Sunday, 1 September 2019

Interior cushion replacement


Windstar Cabin Upholstery


Updated - Aug 27 2020

The project was completed by Premier Drapery and Upholstery in Whitby ON.  This is the second  time Judy has done work for me and I can recommend them as doing both good work, and conducting good business.  
Fabric chosen was the Aerotex Olefin, in the blue shown below.   Pillows from Ikea.  Quite pleased with the result.


I am looking to replace Windstar's original interior cushions and fabric (and blinds) with new.  The interior is typical for a boat of this size and I have photographed construction details of the originals.   

Looking for completion early may 2020.

Fabric

  • Synthetic (outdoor) upholstery most appropriate - acrylic or olefin.
  • Have estimated that project will require 30m X 54" fabric, however this should not be used for quoting purposes as I am no expert.
  • some foam may still be usable.
  • need to consider the style of cushions - same as original?
  • Below are some fabric options, I am open to suggestions.   

C&C 33-2 drawing


Foam

  • Windstar's v-berth and quarter berth cushions (mattresses) are 4" thick, however the seat cushions are 4"+1" softer foam on top, giving edges a rounded appearance.  These comprise several cushions each, so sleepers must contend with gaps between cushions.   Thinking mattress toppers with fitted mattress pads on upholstered cushions is the best way improve comfort, while protecting the upholstery.
  • Seat cushions will take some though, perhaps layered

Foamite Toronto visit - August 2019 - recommendations

  • 2" Mattrress Topper:  Ecocell EC-26  (for V-berth,
    Quarter berth.   Not necessary to quote this unless you wish to make some fitted sheets.)
  • Mattresses:   Koosh KN31, Med Firm
  • Seats:   Koosh KN 41 Firm
  • Koosh is a 2.5 to 2.8 lb HR (high resiliency) green coloured foam with "the most soy". 


Cushion dimensions and Construction

See pics below of cushions on 12X12 tiles

Quarter Berth

This consists of two cushions, the underside of which seems to receive more chafe and damage than any other.  Perhaps the underside should be upholstered in vinyl or some other more durable material.
I may use a mattress topper here with a fitted sheet for use as a bed.   The smaller cusion doubles as the nav desk seat, so it is subjected to more use than any other berth in the boat,


V-Berth

Typical arrangement.   I will use a mattress topper with a fitted sheet to span the gaps here and make a more comfortable bed.


Main Cabin, Starboard

Self explanatory.  Note the channel for the shroud strut in the top of the forward cushion back.


Main Cabin, Port Side


Note the two "filler" cushions used to make the L-shaped settee into a truly awful double berth.


Fabric options


Here are a few.


Sunday, 28 July 2019

Where to keep the Flares?

Flare storage box and mounting bracket


A small project to ensure the flares can be quickly found, while still being out of the way.   

I scoured Amazon for boxes and found this - a perfect fit.   I then made a fitted bracket and installed it in a visible but out-of-the-way place.  Will add a bright and easy-to-read label.

The bracket is made of 1/4" acrylic plastic, bent using a strip heater.   You can see that there is a doubling of thickness on the back of the bracket to permit the strap to pass.  That doubling was done by fusing two layers of acrylic together with a solvent called methylene chloride.  I have used this  stuff many times without incident but this time I unknowingly splashed some on my leg, the result being some deeply-blistered chemical burns that I became increasingly aware of some hours later.   (these are taking weeks to heal)

It's a easy to be cavalier about safety...  please be careful.