Improving Windstar's Refrigeration
As Windstar is currently outfitted, refrigeration is by far the largest consumer of electricity at anchor, limiting the time she can be powered by her 230ah house bank. As purchased, there were other functional issues, covered below. The condenser/evaporator unit is made by Novakool, p/n LT-200, made in 1999.
Update August 15, 2020
The new lid is finished and has been in use for a month or so. One piece, no hinges. It works fine and makes cleaning much easier. I don't think there's a lot more that can be done to improve the 33-2's refrigeration in the existing footprint. The teak fiddle and the laminate top (Wilsonart "Putty") is a very close match with the original interior.
Updated - June 10, 2020
The following solved the frosting and energy consumption problems as well as is practical within the stock footprint, so next I turned to replacing the countertop with a single piece with teak fiddle to match the original. Basically laminate was epoxied to both sides of a plywood sheet, it was trimmed to size with a flush-cut router bit, and a teak fiddle created to match the originals. I did not counterbore and plug the screw holes as the screws are out of sight anyway, and I prefer ease of refinishing to ultimate cosmetic perfection.
Update Sept 2 2019
Windstar's refrigeration has been significantly improved, and after many weeks has not required defrosting. Food remains cold much longer than before when the fridge is off, and when running, the thermostat can now be left on setting 1, and food will not spoil.
Initially, post-upgrade, I was disappointed that the unit still ran 75-80% of the time. This was during a mid-summer heat wave, with temperatures in the 90s and high humidity. I was then unaware of the non-linear relationship between ambient temperature and fridge temperature, and have observed (bur not measured) that in more moderate temperatures, the compressor might run 20% of the time, or less. I recall reading but cannot now locate a chart which showed that the fridge will run 3X longer per hour at ambinent 90 deg F than at 70 deg F.
I am pleased with the improvement, and doubt that there is much more that can be done to significantly improve the performance of the fridge within the limitations of the interior furniture. Would be interested to know if there are further improvements that could be realized.
Also see this post on how to drain the ice box.
Also see this post on how to drain the ice box.
Original posts - July 2019
Windstar's fridge worked, but never did work well. The evaporator iced up quickly, it seemed to run constantly, would freeze in parts and be warm in others. It needed constant defrosting which filled the bottom with water... in short, a nuisance.
My first tack was to email NovaKool asking about the expected performance of their refrigeration unit and after some patient and very helpful questioning about the installation, was informed that the unit was likely functioning correctly, and that until the box could be sealed it would always frost up quickly and simply wouldn't function properly.
The 33-2 has a two-section lid which is theoretically convenient, but is both poorly insulated and impossible to seal where the two halves abutted.
So. I puzzled over various too-clever solutions to seal the two halves of a split lid, and in the end decided to start with a simple, single-piece insulated lid that could be made to seal against the flange at the top of the fridge.
Making the lid.
The project started with a thin sheet of fiberglass laminate glass laid up on a large piece of waxed plate glass. One sheet of mat between two layers of cloth, made with polyester laminating resin was enough, and one side is of course glassy flat. Once cured, it was trimmed very approximately to size. More detail on making fibreglass parts can be found here.

I had puzzled over insulating materials for awhile and in the end stopped puzzling and used sheet styrene from Home Depot. Inexpensive and easy to work with, it does not have the highest possible R value, and is not compatible with polyester resin, so any "wet" work would require different adhesives. Perfect is the enemy of better.
I laminated two 1" thick sheets using 3m 77 contact adhesive, (great stuff!) then cut it to size on the table saw, with each cut edge beveled a few degrees..
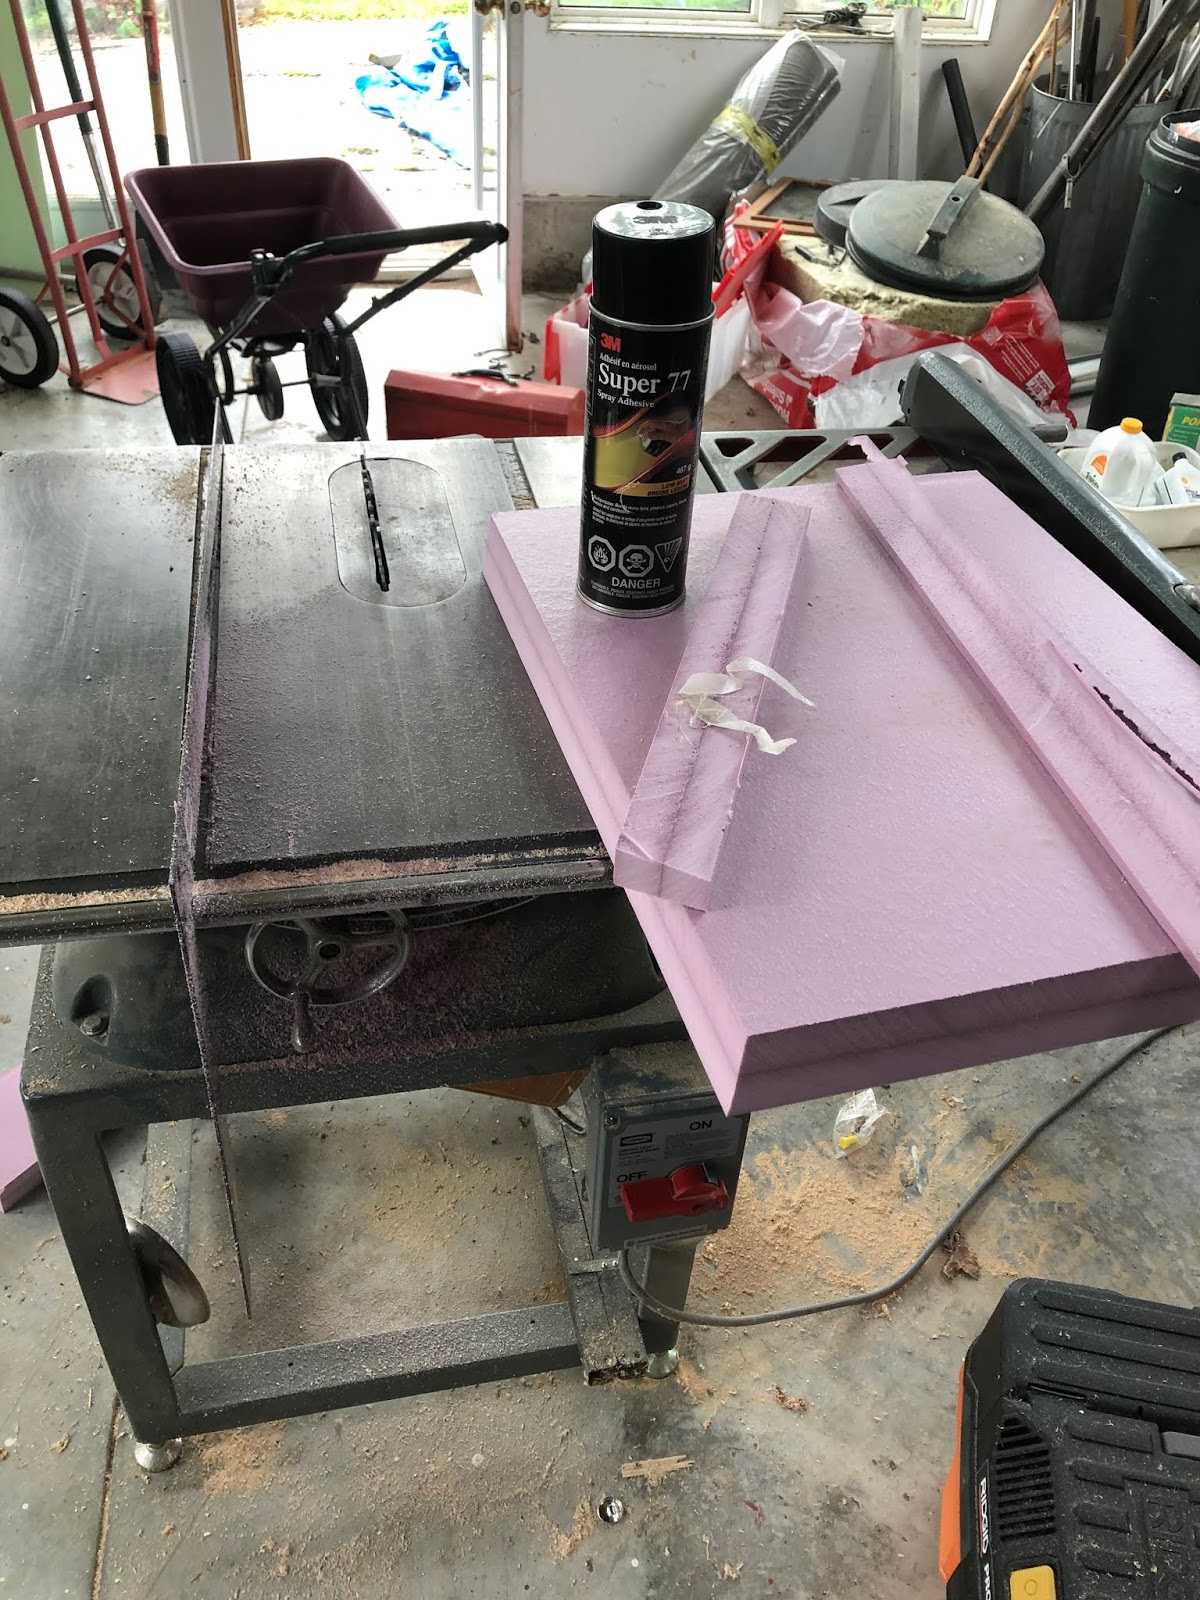

Once cut, it was then glued to the fiberglass sheet, again using 3m 77. The corners were then gently radiused in preparation for sheathing with glass cloth and epoxy resin. This type of foam cuts, machines and sands easily, making it great for forms for composite work with epoxy and 'glass.


The cloth was laid on its bias (the weave diagonal to the corners) so it would wet out and drape more easily and I'm happy to report no issues or voids. Some strategic reinforcement around the flange and on the corners and its done. Very light.

This single piece replaces the two ugly panels below.

Upgrading the Interior of the Fridge
In for a penny, in for a pound, I decided also to make a removable shelf, and to reinstall the evaporator box, as it had been really poorly done and needed to be lowered to clear my new, thicker lid.
These spacers are made of two layers of 1/4" acrylic.


Shabby shelf.


Ugly wire shelf.
The new one started with a sheet....

Bent with a strip heater and an ad hoc bench fixture.


The insulated portion of the lid in place. You can see in the photo above, that strip of counter at the back is intact. After some thought, I elected to remove this as you can see in the photo below.

So far so good.
Upgrading the Box
This was something I'd been puzzling for awhile; essentially how I might supplement the 1+" foam insulation used by the factory. In the end, I kept it simple and bought a can of spray foam and extended the nozzle with some straws donated by a local Wendy's, and supplemented the outboard side and bottom of the box. Access is a challenge and there is really no practical way to add insulation elsewhere from the outside, so it is necessary to accept less than ideal insulation. (though improved)

While working inside the box, I noticed a gap between the ice box mold and the countertop (hull liner) mold. The box is a separate unit, installed below the countertop.) I caulked this gap with silicone around the entire perimeter of the fridge.
While testing, I also noticed condensation on top of the fridge, along its aft edge. This 2" deep , 22" wide flange is uninsulated, as are the 1.25" wide flanges along each side. This is a significant shortcoming, second to the unsealable lid, with around 80 square inches with no insulation at all. (!)
Insulating the Flanges
Turns out I had just enough 2" thick off-cuts from the lid insulation board to make insulating "bars" that could be siliconed in place to better insulate the top.
First, they had to be cut and radiused. The stuff is easy to work.


Ready for epoxy.

Then, coated with epoxy, and fibreglass cloth set into the wet epoxy for durability. Once cured, sanded and trimmed, they were painted then glued and caulked in place with silicone.


No comments:
Post a Comment
Comments and corrections welcome!