2022 - deck hardware refresh and upgrades. Hatches.
Update March 2023
Am I unique in experiencing satisfaction from carefully assembled, adjusted and lubricated mechanical bits? These hatches now operate like a space shuttle air lock. LOL- maybe not quite, but the difference is quite remarkable, primarily due to the compressibility of the new gasket material.
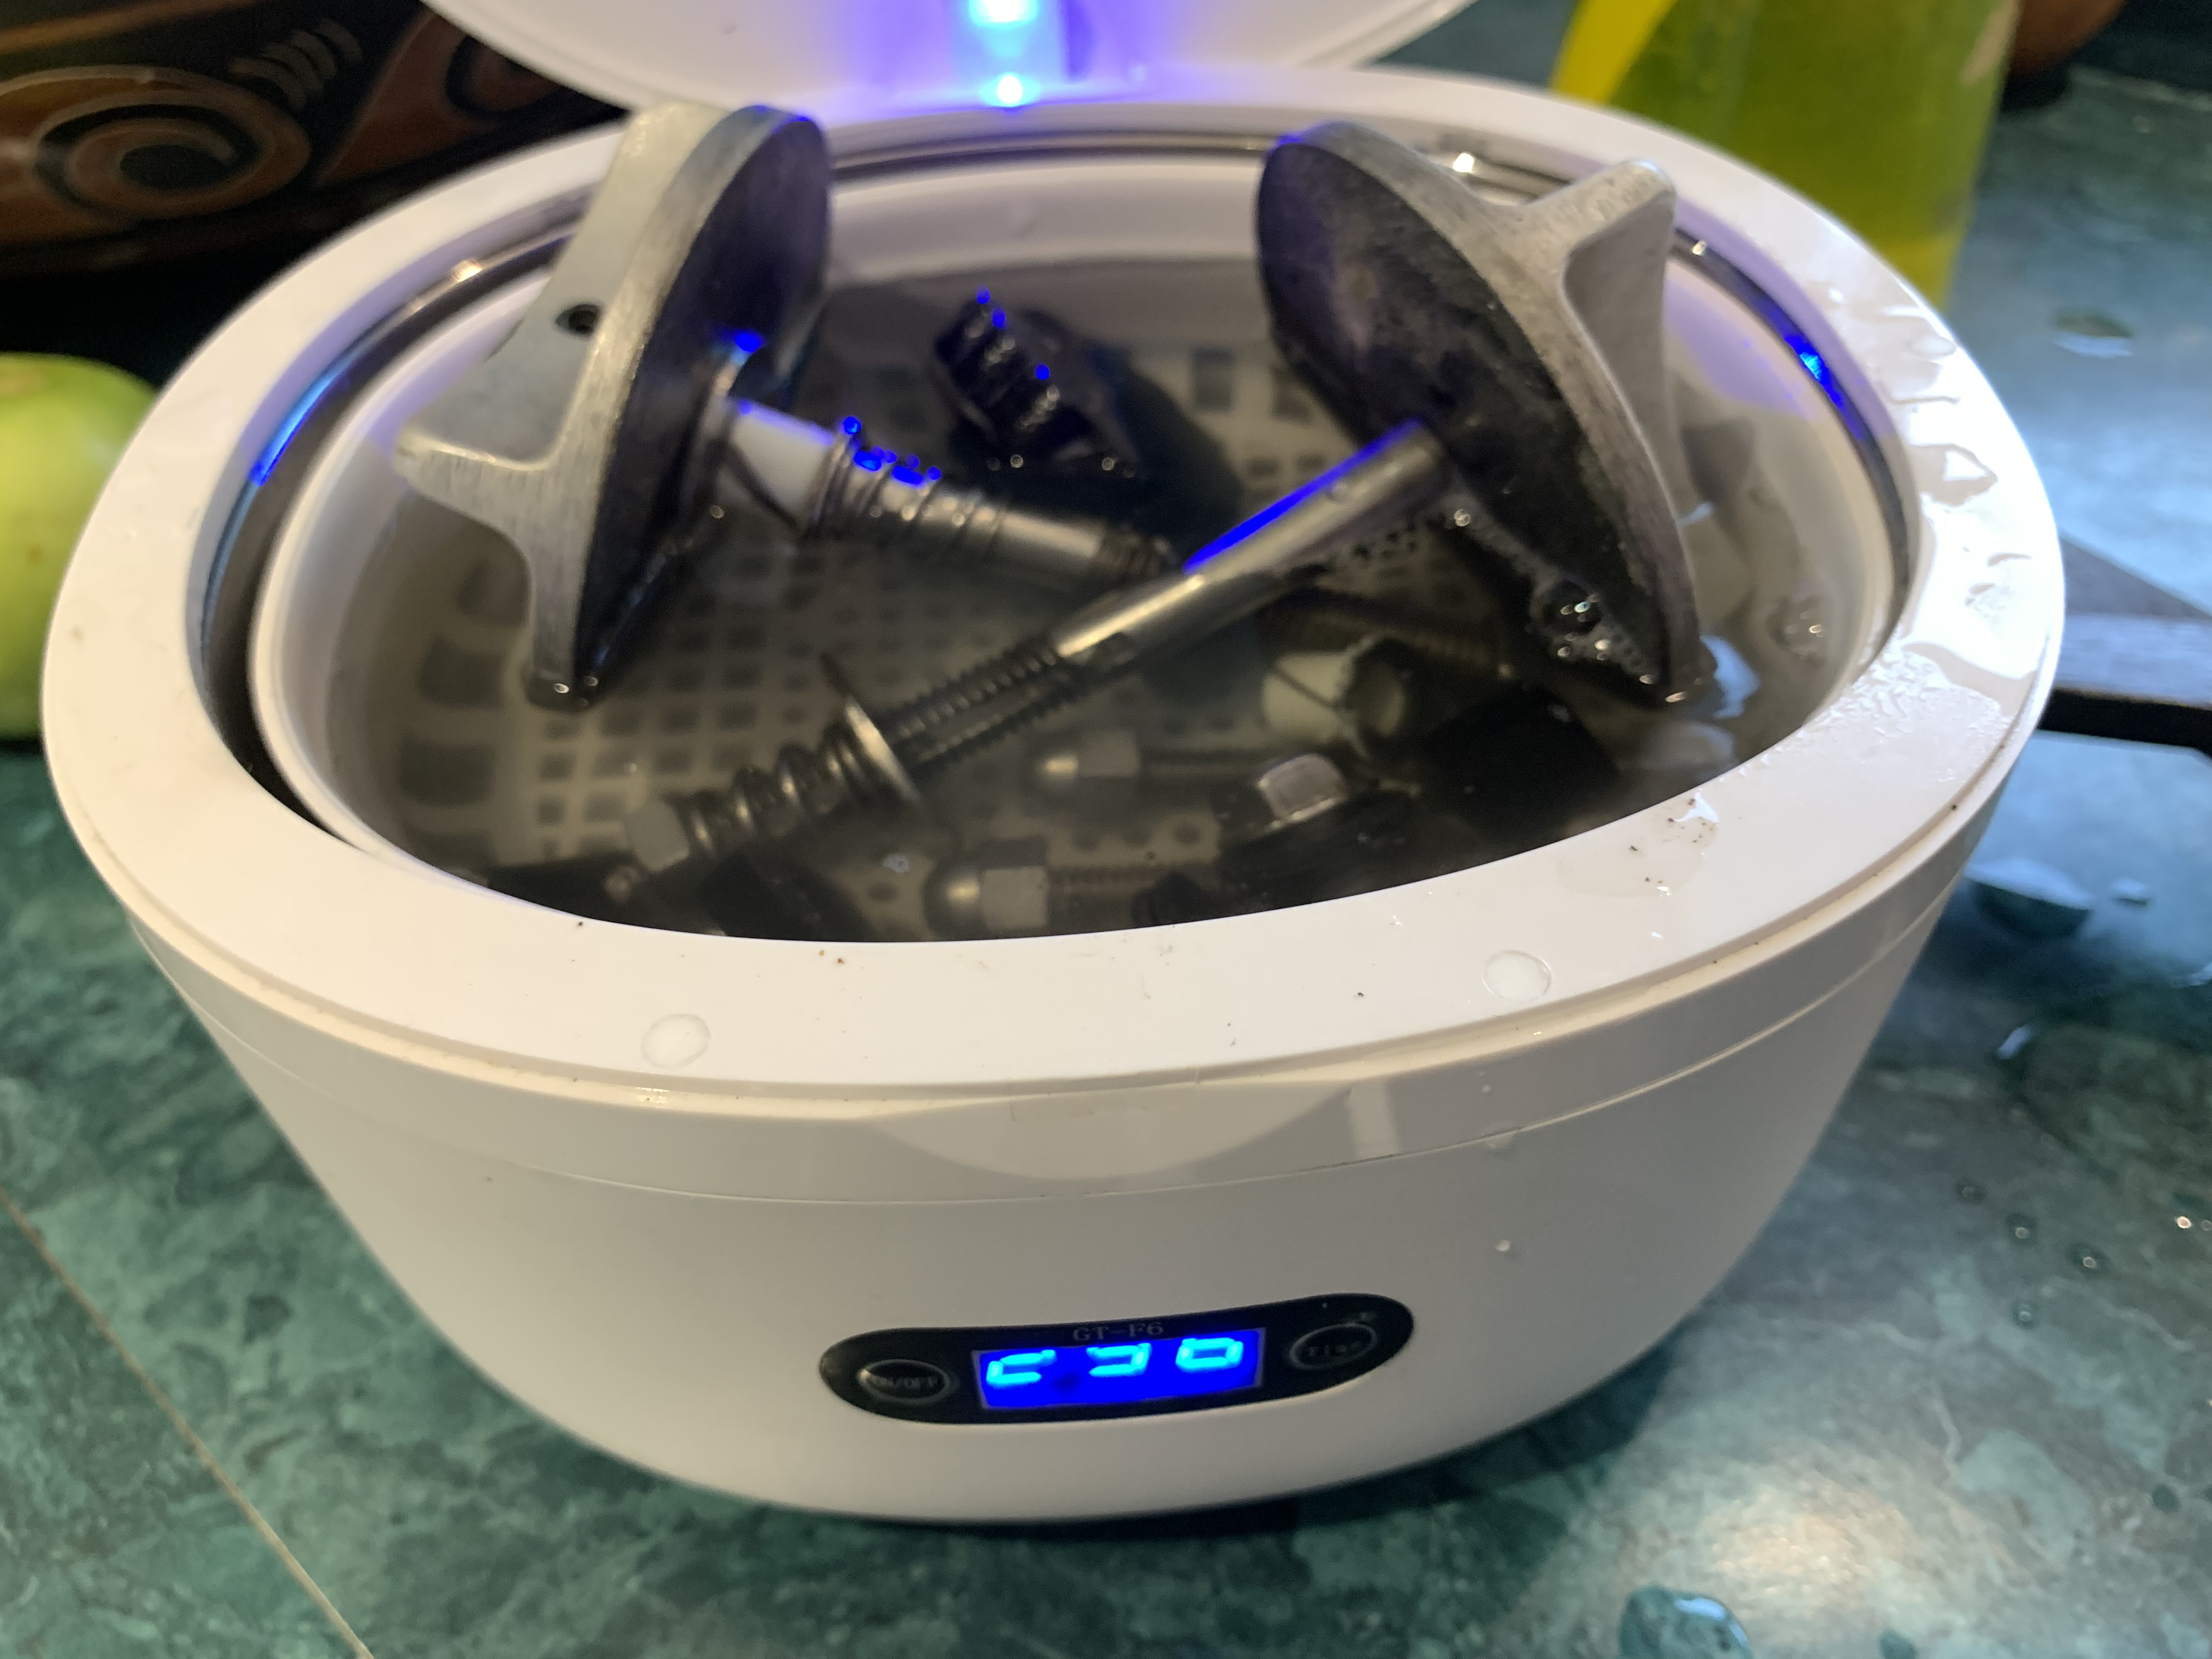
Spent the afternoon reassembling the mechanical parts of the Bomar hatches, after having ultrasonically cleaned the various bits. Irrespective of the replacement cost, The hatches were really well made and rebuilding them ‘as new’ seems like the right thing to do.
Windstar’s new owner will get a bonus.
Update - Feb 2023
Finally found the time to advance this project. After imagining all kinds of over complicated ways to replicate the original hatch lenses, I simply used the originals to set the tablesaw fence and had at it. You can infer the rest from the photos. Some thought and process design was required to accurately replicate the counterbored holes in the large hatch. I used Dow 395 I had kicking around as was likely used originally. Prepped with an alcohol wipe, and after removing excess silicone, I found out why there's an expiry date. What a mess. Another cleanup, a new cartridge, and a final wipe with alcohol tooled the joint. Several more hours involved and a couple of weeks lost, but Windstar’s future owners will appreciate the result. More pics to come.

Hatch Frames powder Coated
Update, Dec 26/22
After spending way too many hours stripping, scraping, wire brushing and cleaning up the mess I brought the hatches to a local powder coating shop, who sandblasted and powder coated the 6 pieces for C$150. Sometimes that's how it goes. They look great. This is my first experience with powder coating, I hope the finish is a durable as the original.
worst job ever… well, almost.
Turns out they aren’t anodized but likely powder coated. Removing this stuff with todays non-lethal paint strippers is incredibly time consuming. This took strippers and various types of wire wheels/brushes and many many hours. There has to be a better way…
The horror….
The Original, cheerful, optimistic post.
Windstar’s hatches have stood up very well over her nearly 40 year life however they were showing their age with crazed plexiglass, hardened seals and weathered anodizing.
Apparently current production (2022) Lewmar ocean series hatches will fit, however the cost is significant and I do wonder if they will last 30+ years like the originals.
The original hatches appear to be of very good quality, and refurbishment does not seem to be too difficult.
The hatches will need to be:
- removed from the boat,
- disassembled to bare frames for re-anodizing ( or powder coating?)
- chemically stripped of adhesives/sealants,
- any worn or damaged hardware sourced,
- Gaskets and lenses replicated and replaced
- reassembled
- reinstalled
Removing The Hatches
James and I removed them and scraped off the butyl in about 2 hours. Was kind of surprised to find wood screws. Not sure what I was expecting.
Thankfully it was warm under the winter cover, which meant the butyl sealant was fairly pliable. The blades pictured were progressively tapped in to the butyl sealant to gently separate the frame from the deck. The 40-year-old butyl is still supple and slowly gave way. Wonderful stuff!
Once the butyl seal had mostly parted, the entire hatch could be lifted clear. This was much easier to do than I had expected.

C&C did not skimp on butyl.
The holes were countersunk and neatly drilled. No damage. Bravo C&C!
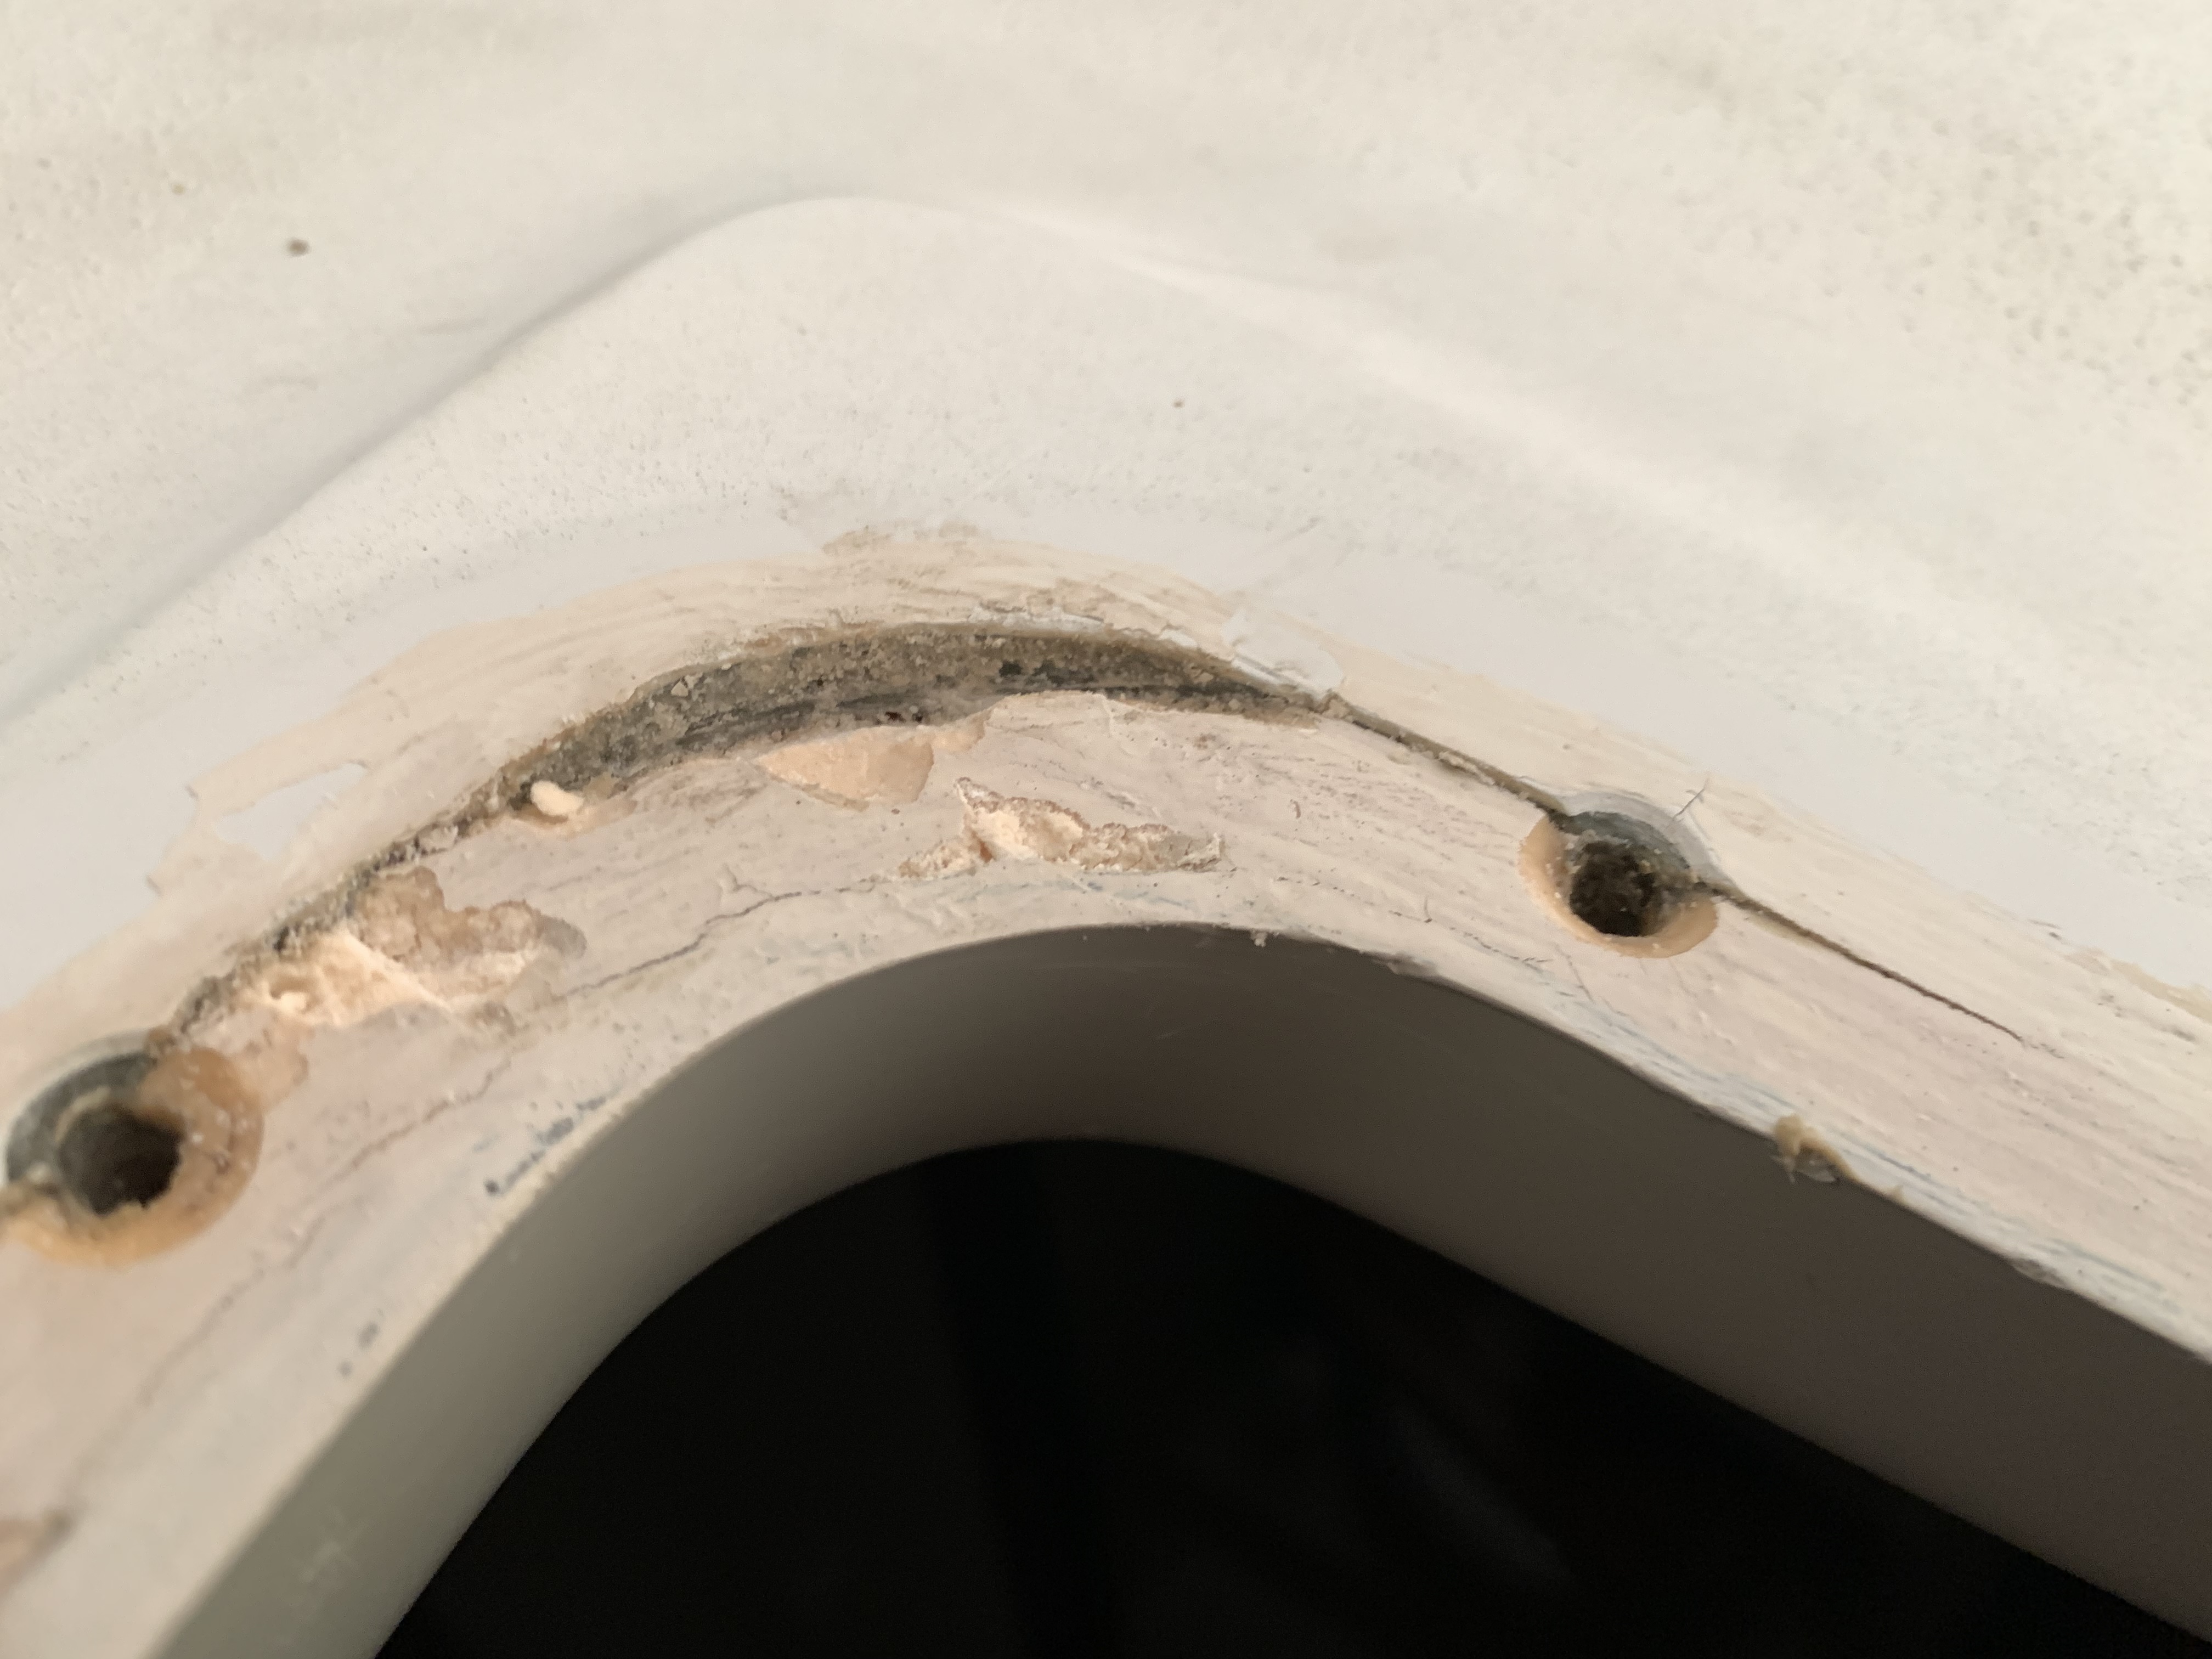
In the next three images you can see that the outer perimeter of this larger hatch was not fully sealed. This made no practical difference over decades of use, but I will build it up slightly thicker on the outer edge when reinstalling.
Surfaces Cleaned up first with a gentle scraper and heat, then with varsol and a 3m scouring pad. You can see that the deck and overhead liners were bonded and the gap with some kind of tinted putty. It has stood up fairly well, and if any water did get in, there seems to have been no damage. (Windstar has no deck leaks or soft spots at all.). I did excavate and fill the corner below with epoxy. Just cuz.
The decks are prepped!
Disassembling the Hatches
By first slicing the silicone from above, then gently inserting a thin, flexible, putty knife between the frame and the plastic lens from below, working it around the entire perimeter, the acrylic lens was very gently parted from the frame. All three were easy to remove intact, and can serve as perfect templates for their replacements.
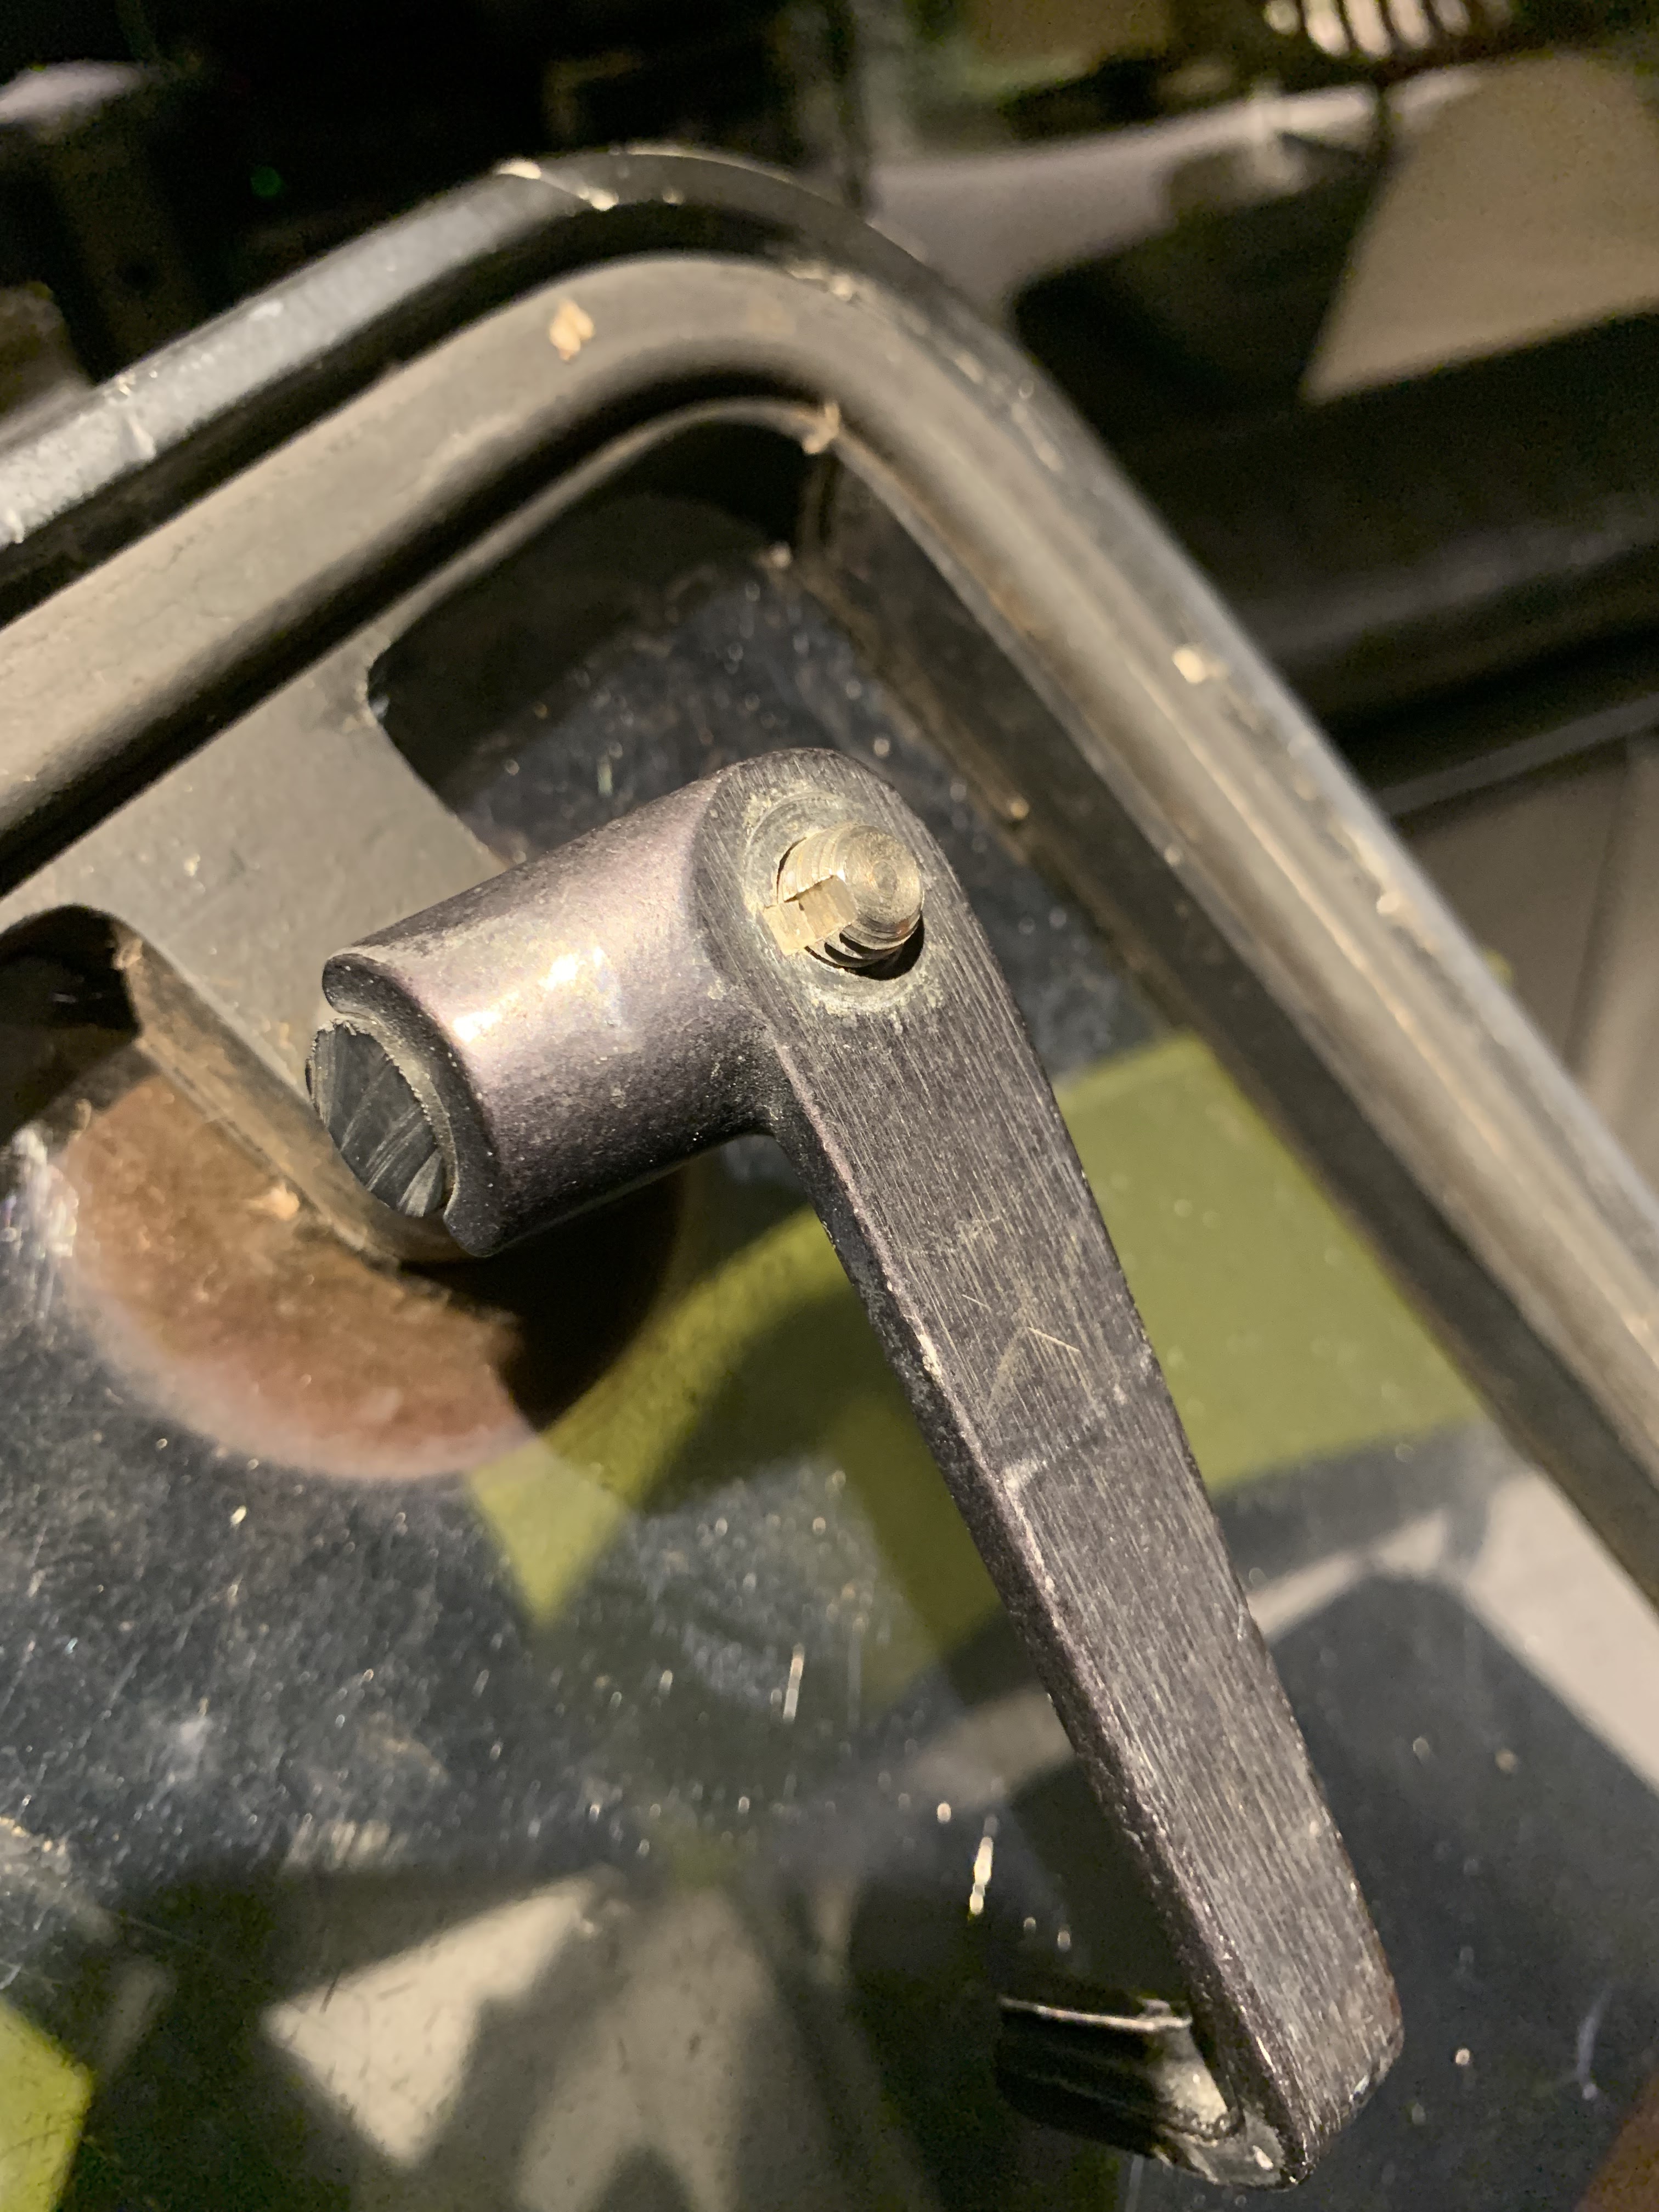
The Latch Puzzle
Easy... until I encountered the latches on the large hatch. These penetrate the acrylic and appear to be staked in place on both sides! A roll pin in a blind hole on top....
And a key in a keyway below. The key is not secured by a set screw. Seriously tough stuff but what approach is best for repair? Hmmmmmm?
I can try to drill out the pin or drift out the key. Is there a trick to this that I'm missing?
Problem solved!
Unfortunately the roll pin is in a blind hole, I cant drift it through. With that in mind I tightened the nut on the shaft to allow for some clearance, and used a small pin punch to try to drift the key southwards. To my surprise, the entire arm shifted - it was not threaded on as I thought, though it is a close fit, made even closer by 40 years of marriage. I then put a drop of oil on the threads and let it work its way down the threads and keyway and used that same nut to push the lever off. So, problem solved! They were snug and one was a bit galled but no damage.
As found, the shaft height above the lever.
Partway there.
Key firmly in place.
Shaft assembly details.
More cleverness! The outside knob/wheel is stood off of the surface of the plexiglass by the stainless washer above but also the black plastic washer below, plus the top hat bushing. The lot is installed while the silicone is wet, before it cures. Note the counterbore in the lens.
After that, the disassembly process was straightforward though some mechanical aptitude is required.
Not done just yet.
When I spoke to Tony the Anodizer he told me that the metal must be impeccably clean and also must only be aluminum - other metals would behave destructively during the anodizing process. This meant that the silicone and butyl needed to be removed AND some press fit stainless sleeves needed to be drifted out. The silicone was quite a bit of work, slicing, then scraping then wd40 and a coarse 3m pad, and the sleeves required some heat and appropriately sized pin punches. These really are well-made hatches.
A few details
That circle is a bit of masking that was placed over the threaded hole to prevent silicone from entering.
This is one end of the main hatch support, the counterbore suggests a missing top-hat bushing.


.jpeg)